-
Updates
-
Patients
-
Appointments
-
Examinations
-
Sales
-
Inventory
-
Promotions
-
Catalogs
-
Dashboards
-
Integrations
-
System
-
Resources
Complete Sales Invoice Workflow
Complete Sales Invoice Workflow
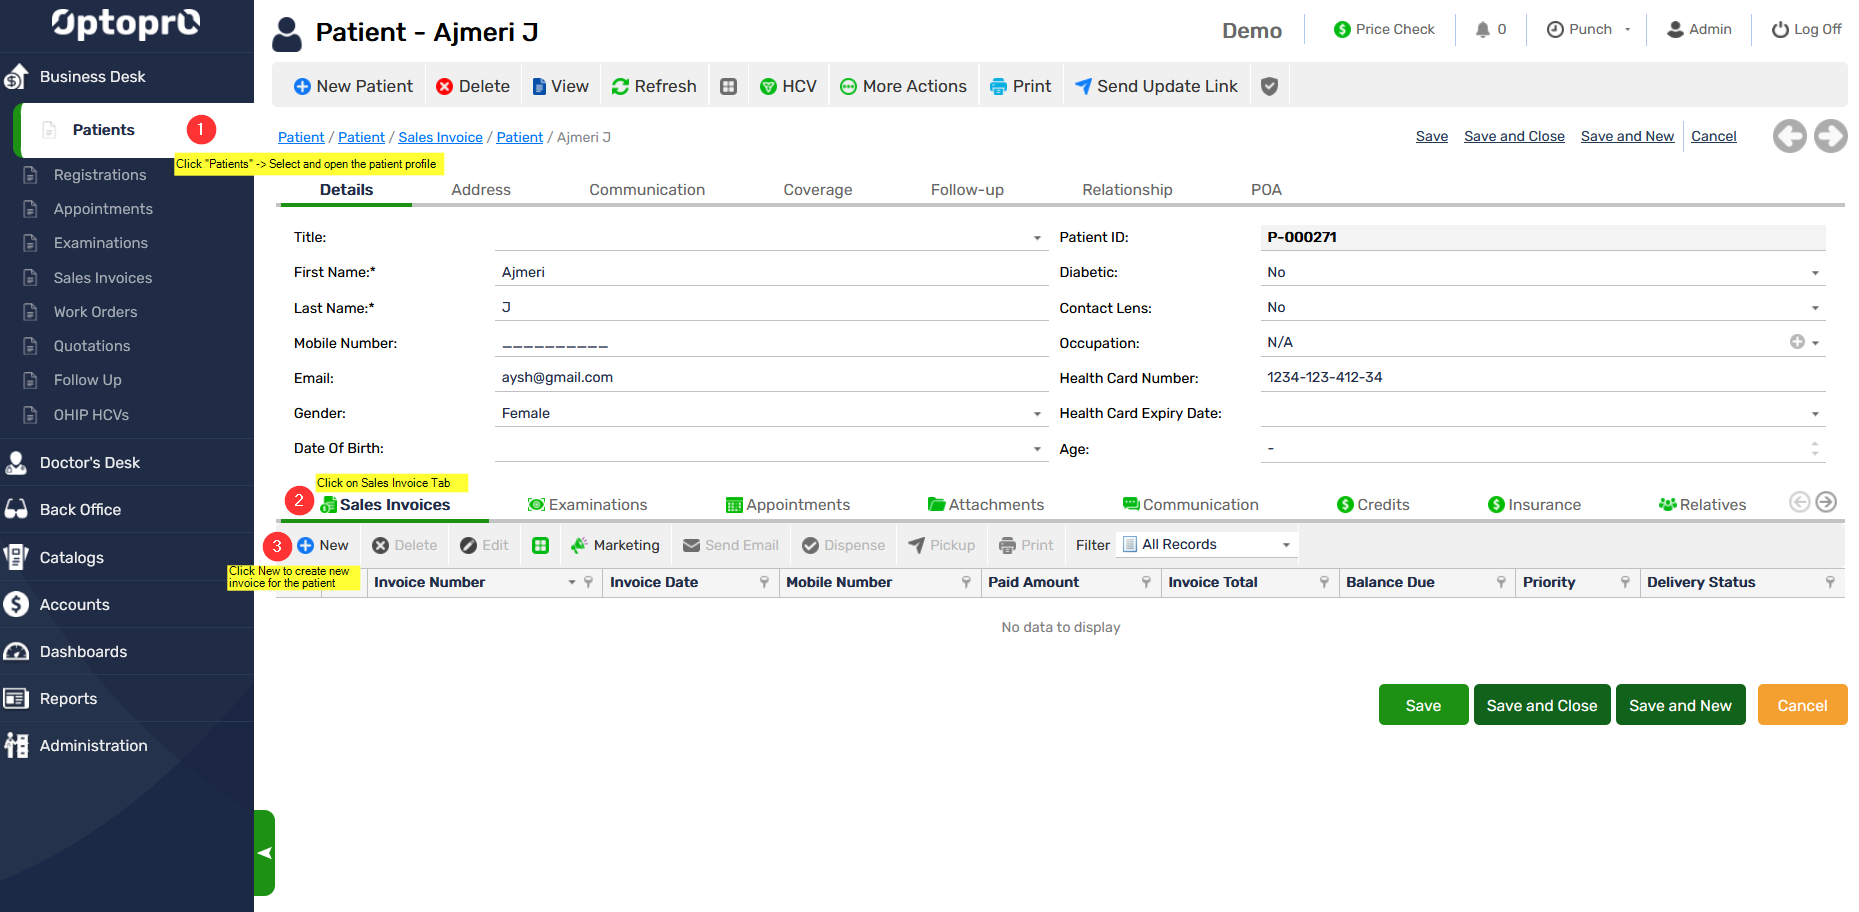
To create a new Sales Invoice for a selected patient, go to patient’s profile
Step 1: On the Left panel click “Patients”
Step 2: On patient’s profile click on “Sales Invoices” tab
Step 3: Click on “New”, to enter details of the Sales invoice
Add a new item to invoice
Step 1: Click on “Invoice Items”
Step 2: Click “New” to add items for the invoice

You can select the item from the list of items from the Inventory and Click “OK”
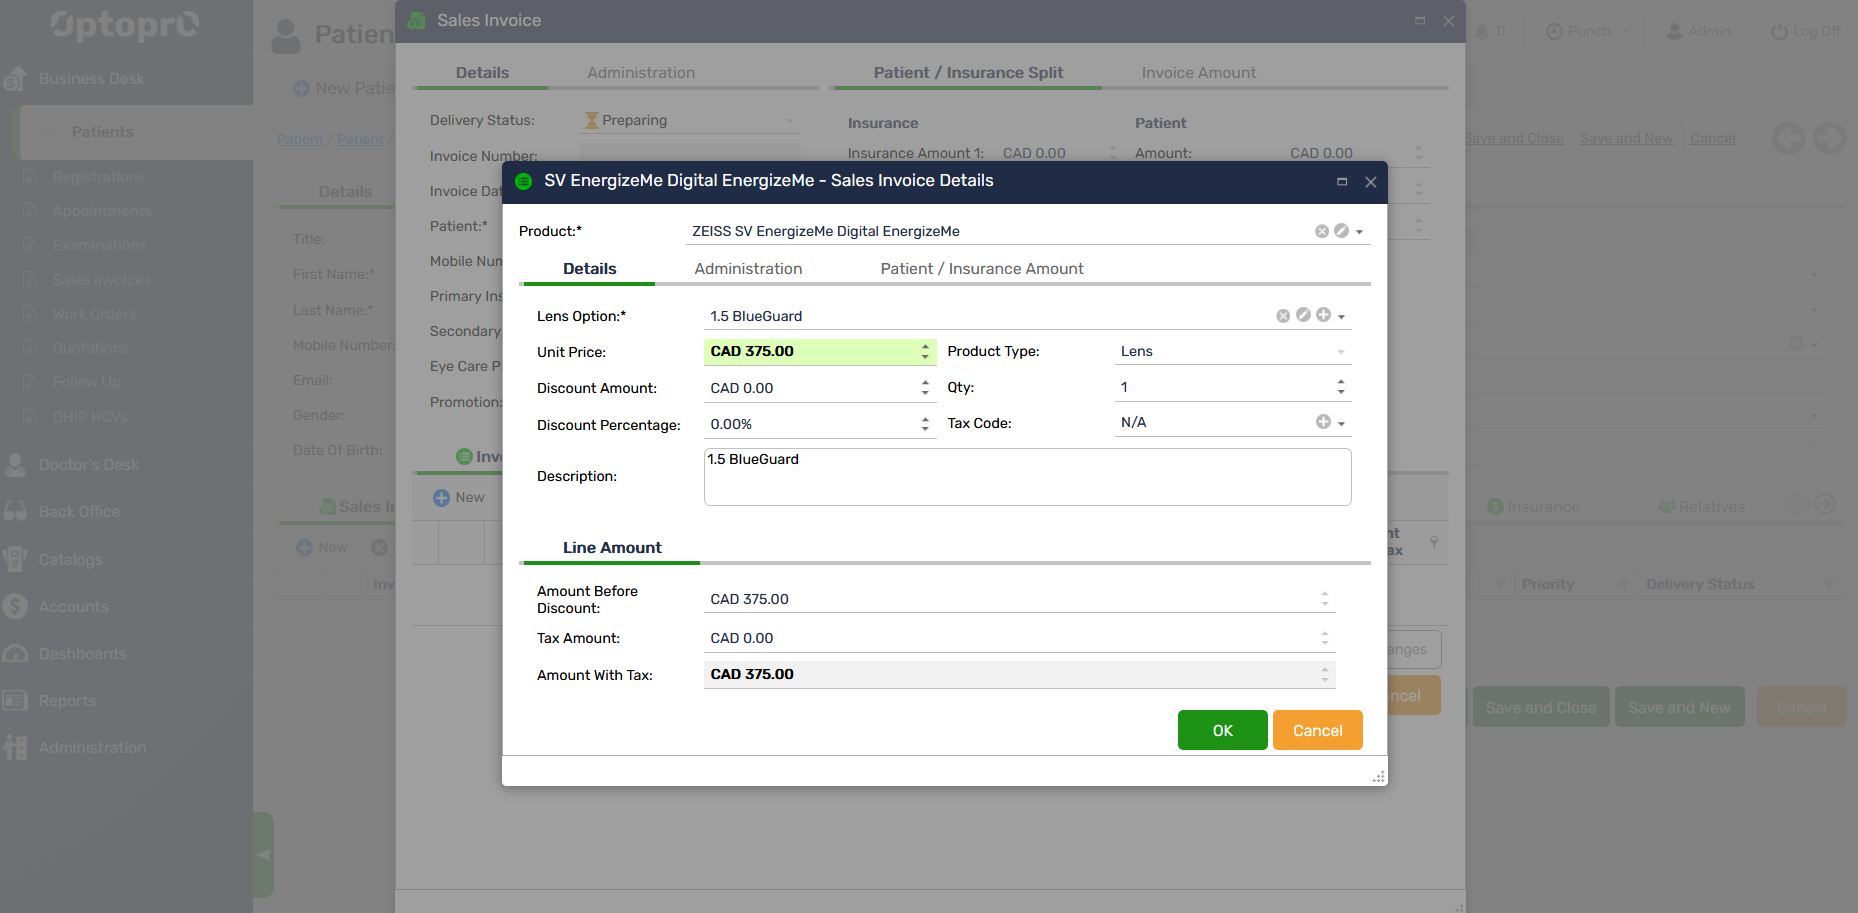
The item is now added to the list of “Invoice items” as shown in the image below:

Adding a New Work Order
To create a new Work order in the Sales Invoice for a selected patient go to patient’s profile
Step 1: On the Left panel click “Patients”
Step 2: On patient’s profile click on “Sales Invoices” tab
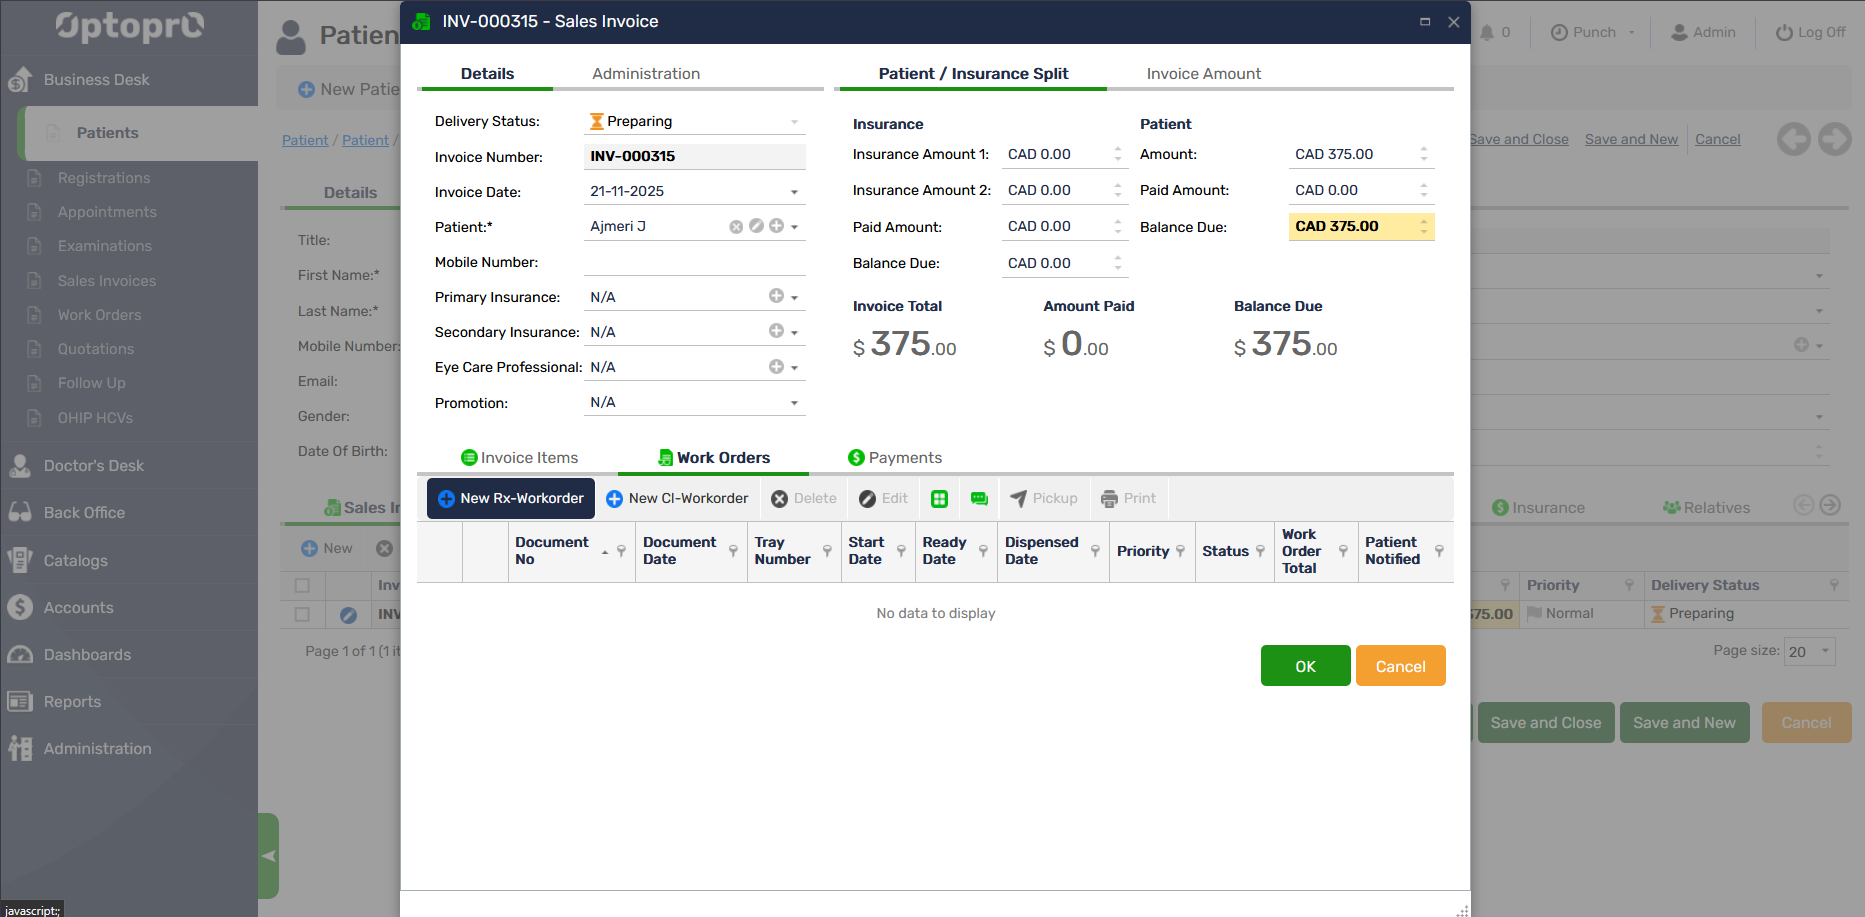
Step 3: Click on the Invoice from the list of invoices for which you want to create a work order
Step 4: On the Sales Invoice window, click on “Work Orders” tab
Step 5: Click “New Rx-Workorder” and enter the new work order details
Enter all the details on the “Rx-WorkOrder” window for the patient.
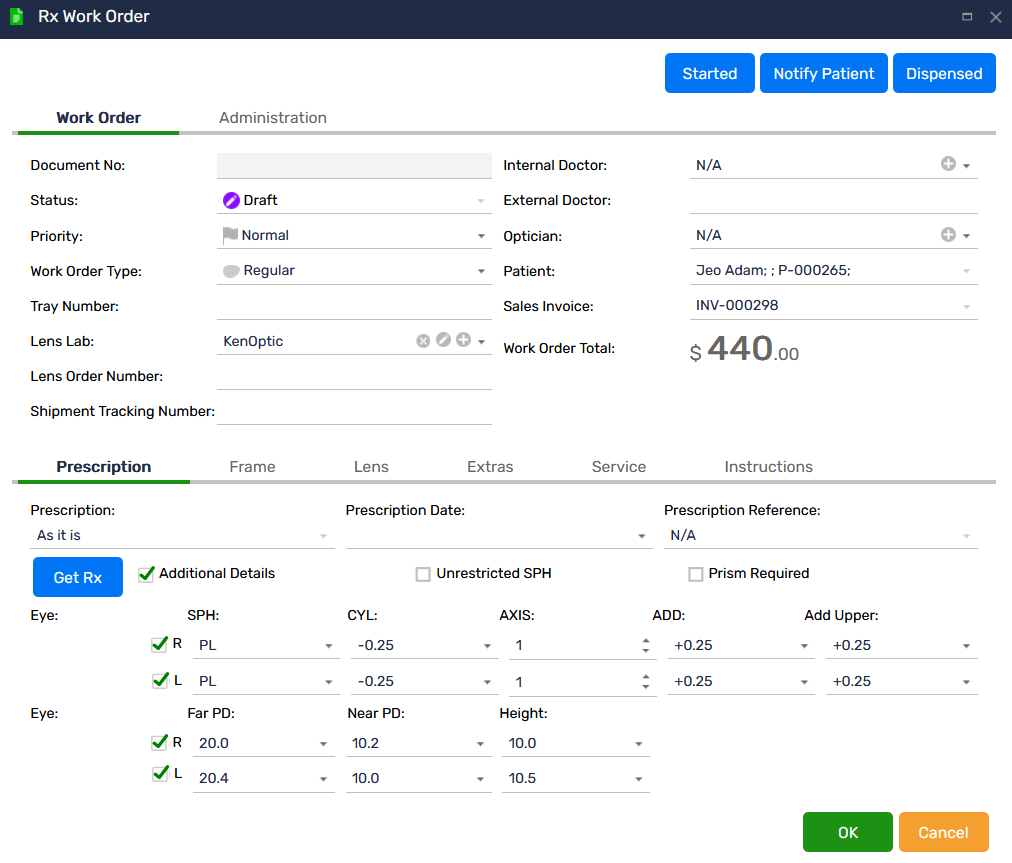
To add the details of the work-order following tabs information is mandatory
Click on the “Prescriptions” tab to enter the prescription details
Click on ”Frames” tab to enter the details of the frame
Click on ”Lenses” tab to enter the details of the lens
Add a Prescription in Work Order
Step 1: Click on the “Prescription” Tab
Sep 2: The details of any previously added prescriptions can be fetched by the system when you click on “Get Rx”
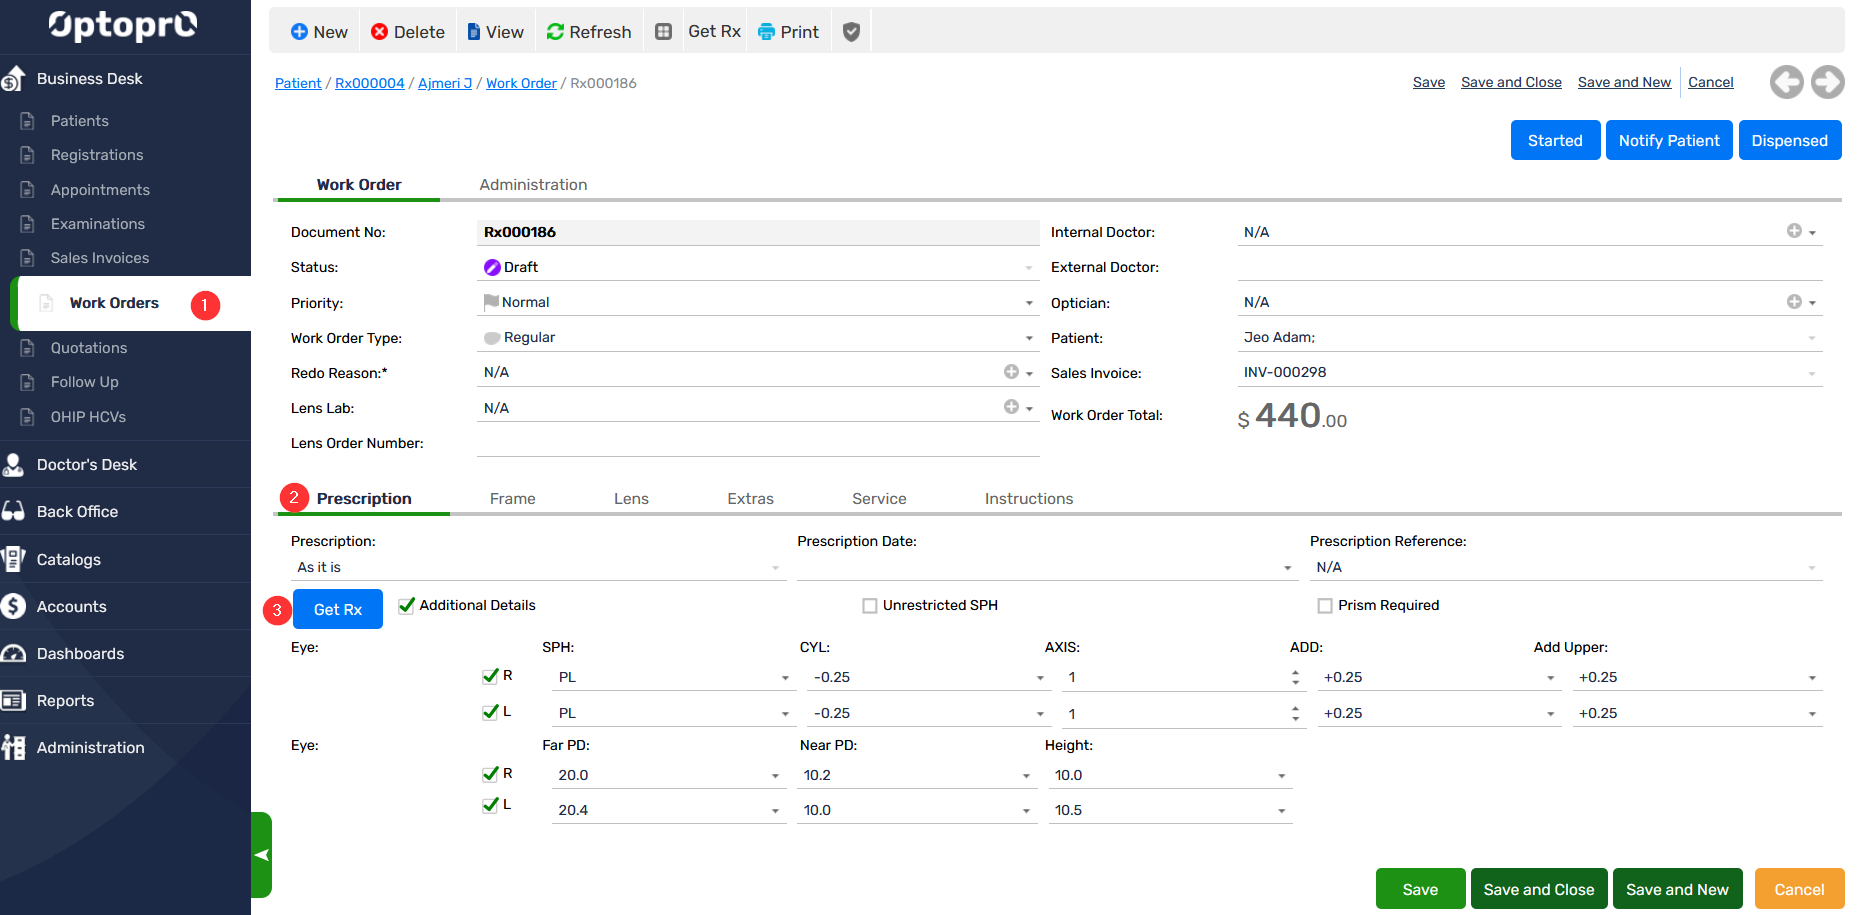
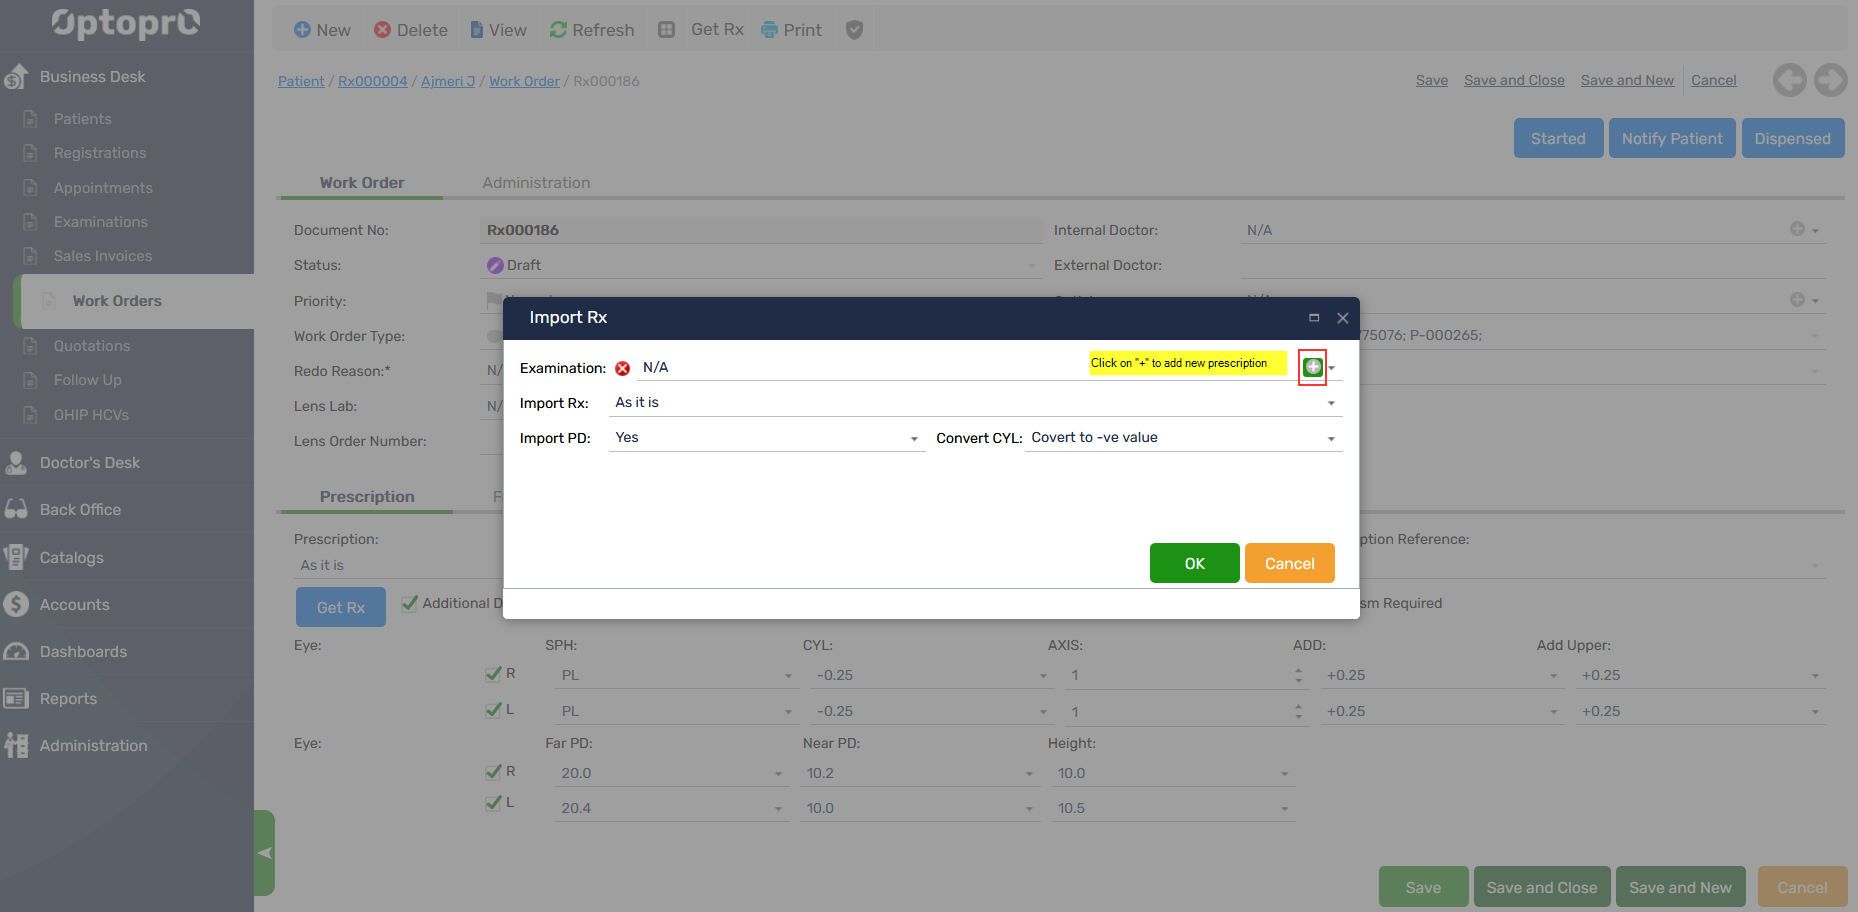
In case you need to add a new prescription, you can add it by clicking on the “+” sign on the right hand-side of “Examination” as shown below
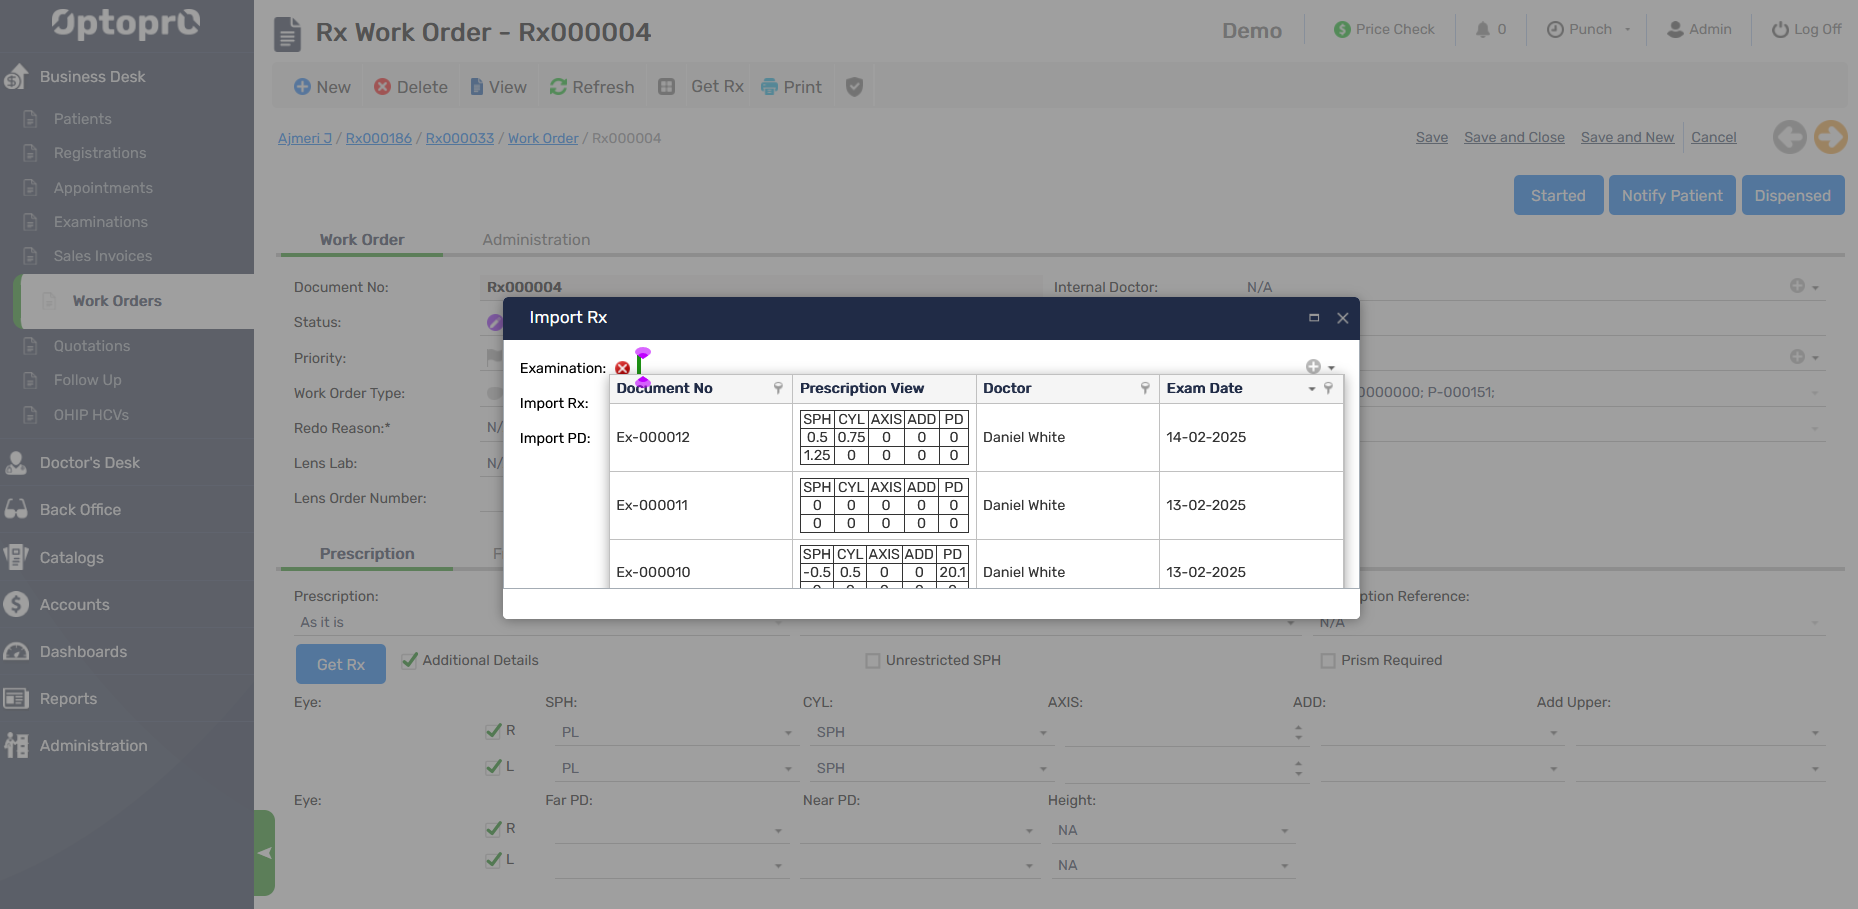
To get the record of the previous prescription click on the drop-down arrow on the right hand-side of “Examination” as shown below
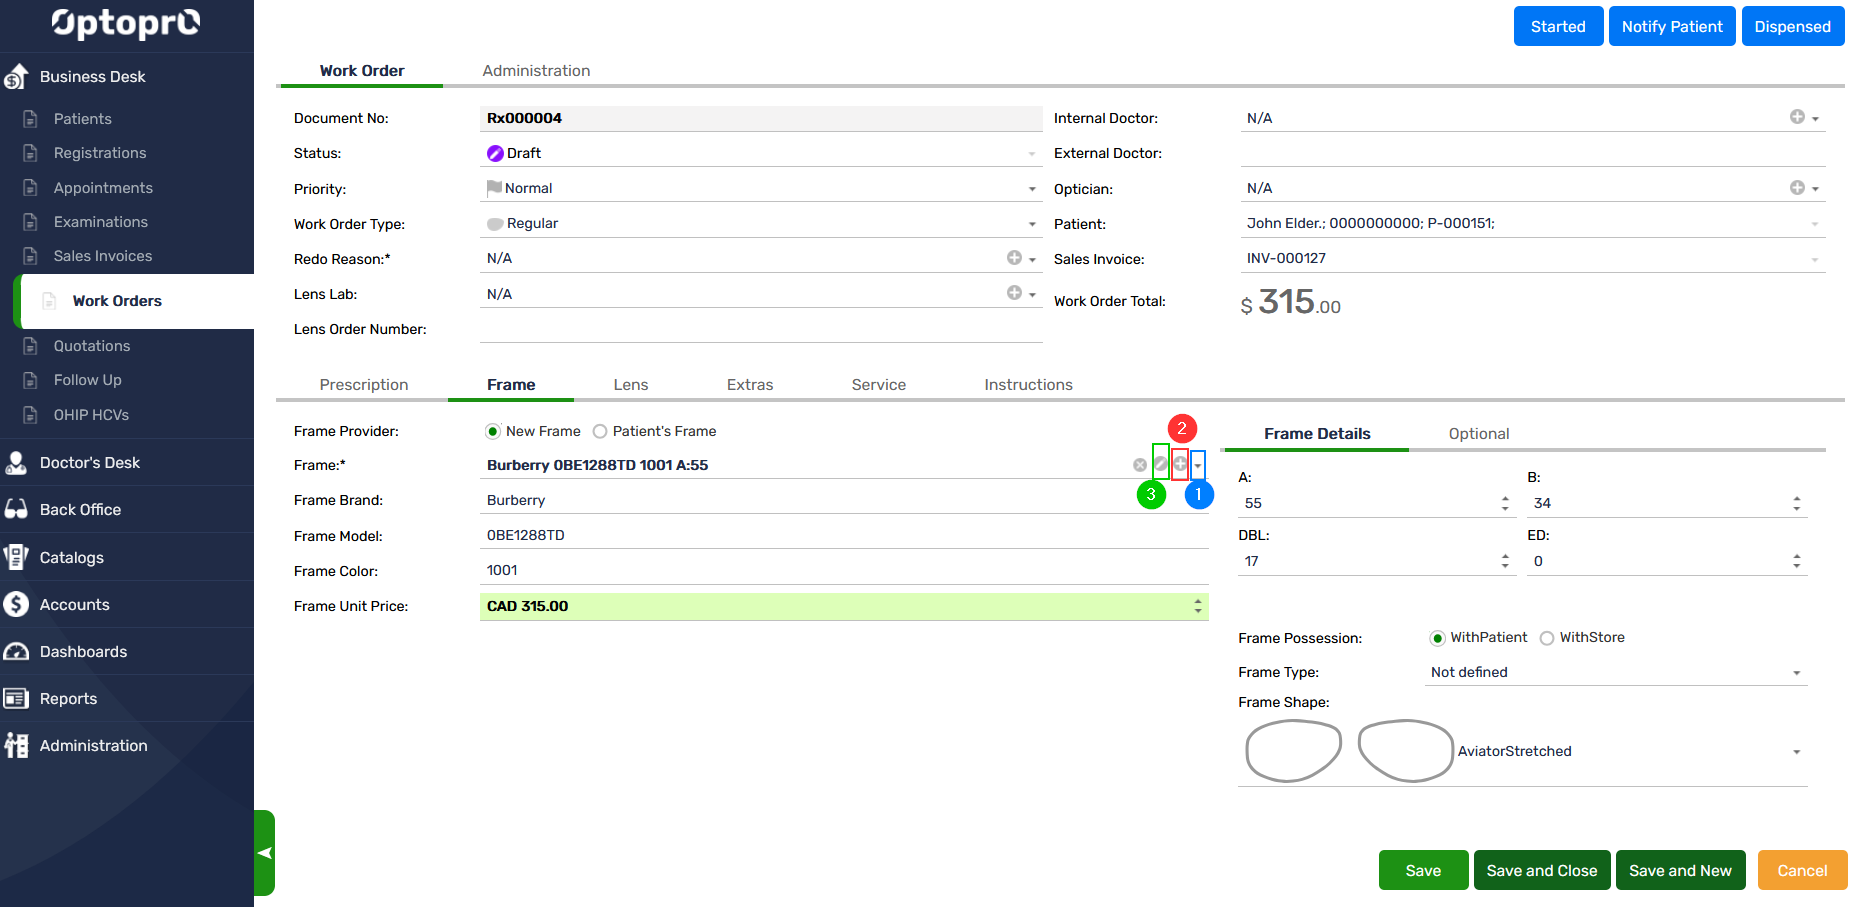
Add a Frame in Work Order
- To get the list of available frames click on the drop-down arrow on the right hand-side of “Frame” as shown in image below with blue color
- To add a new Frame, you can add it by clicking on the “+” sign on the right hand-side of “Frame” as shown in image below with red color
- To edit existing Frame details, you can edit it by clicking on the “pen” sign on the right hand-side of “Frame” as shown in image below with green color
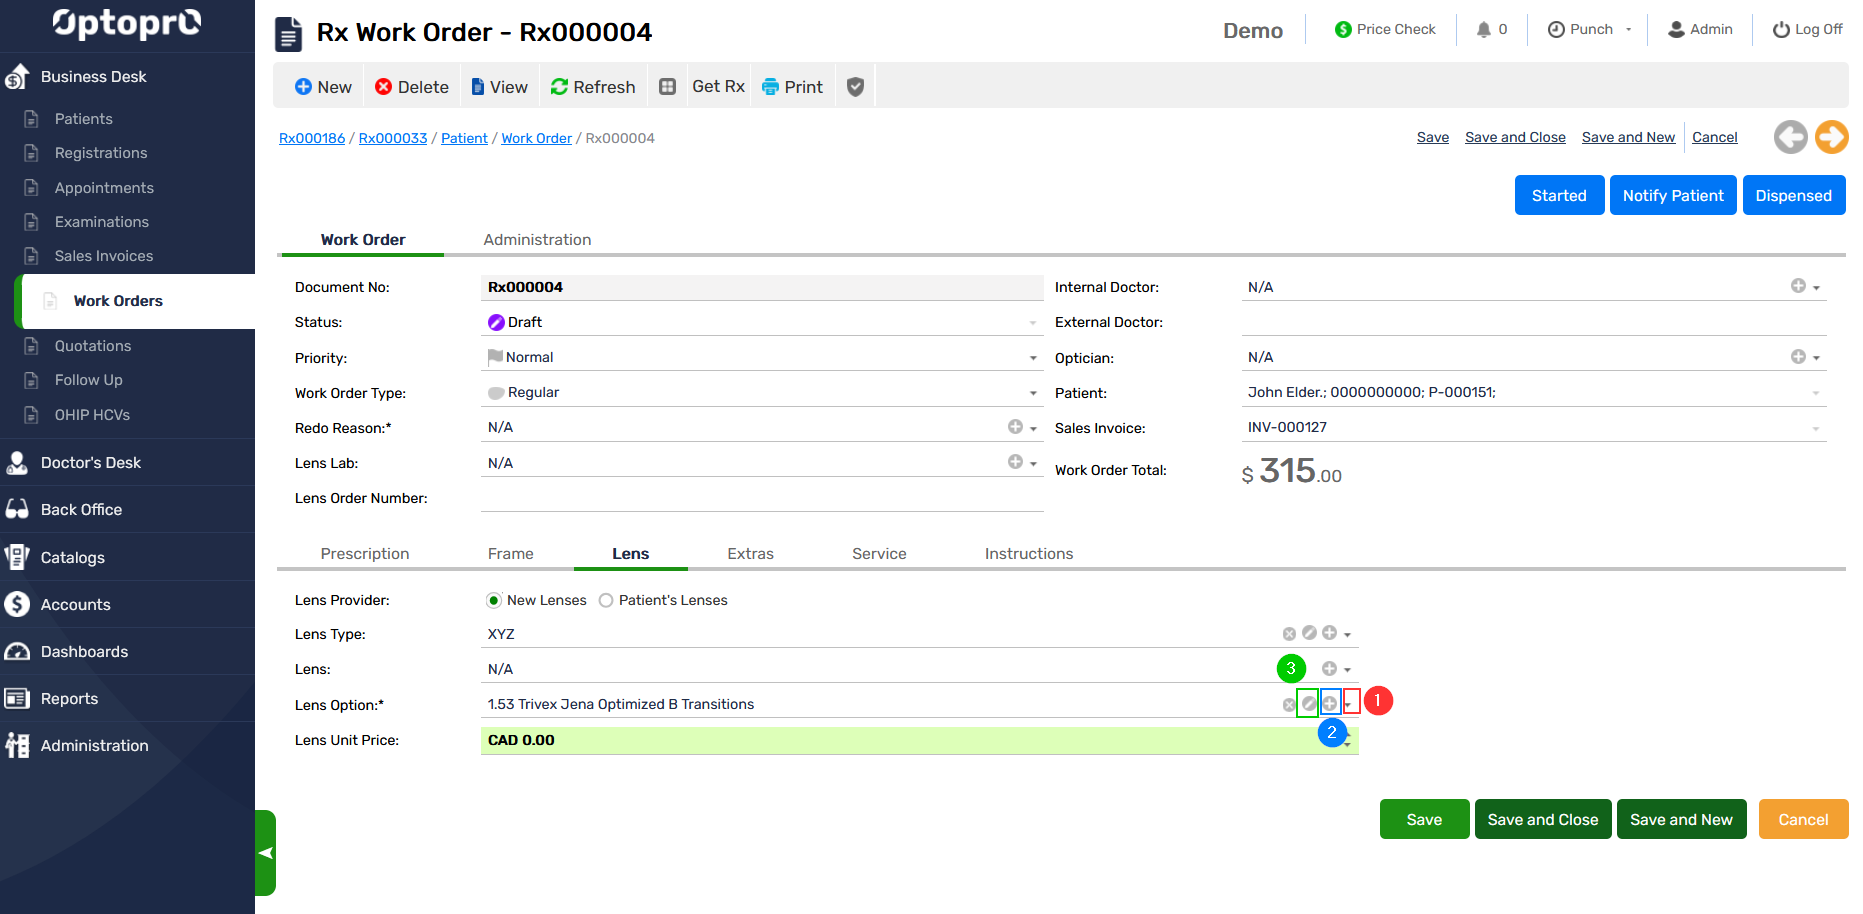
Add a Lens in Work Order
Add lens details like lens type, lens provider, lens and lens options.
- To get the list of available lenses click on the drop-down arrow on the right hand-side of “Lens” as shown in image below with red color
- To add a new Lens, you can add it by clicking on the “+” sign on the right hand-side of “Lens” as shown in image below with blue color
- To edit existing Lens details, you can edit it by clicking on the “pen” sign on the right hand-side of “Lens” as shown in image below with green color
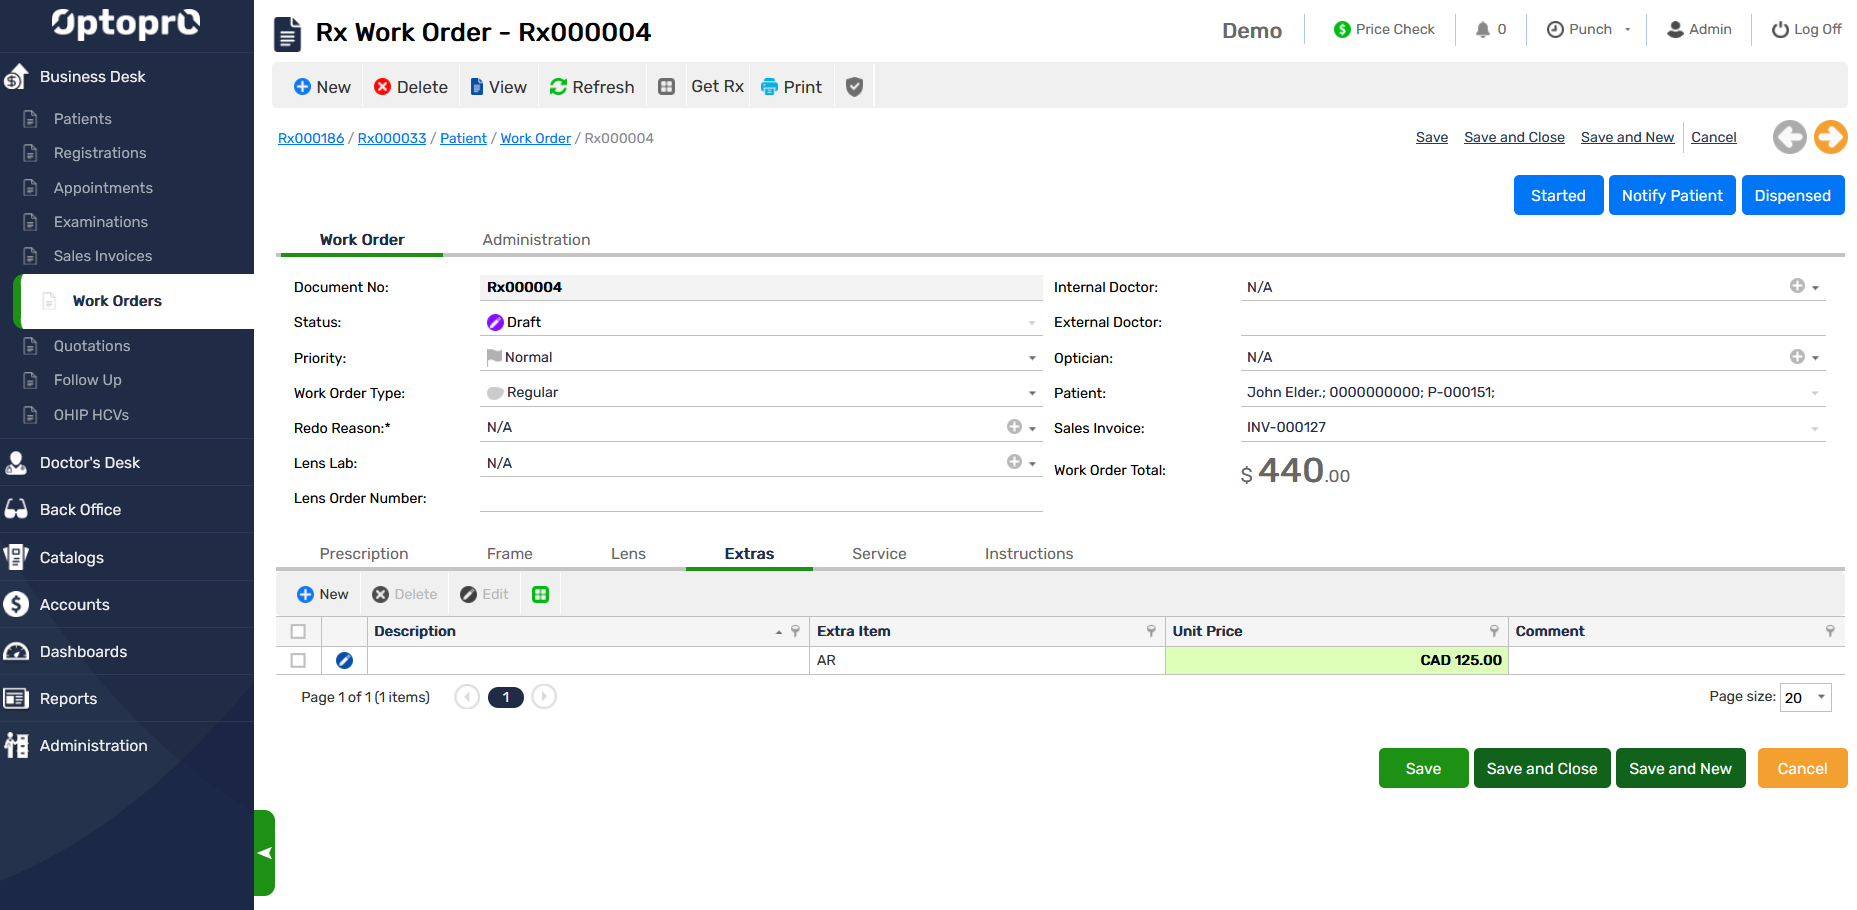
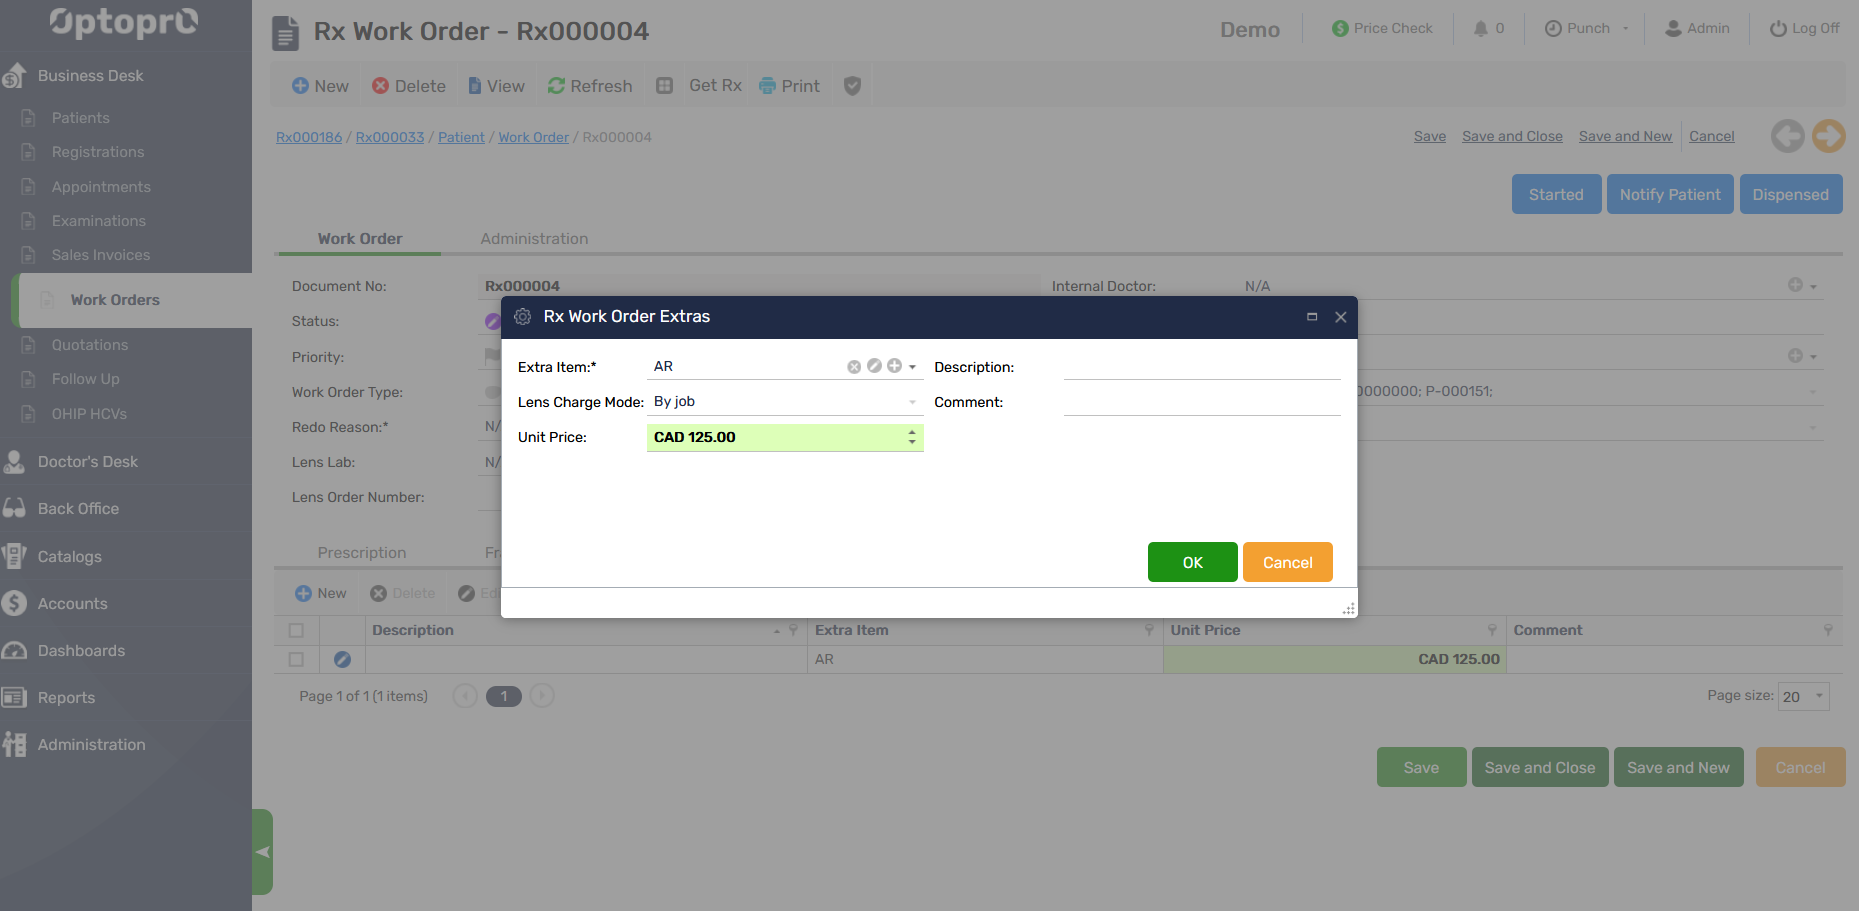
Add Extras in Work Order
You can add tints/coatings in the “Extras” tab by clicking on “New” the following window appears
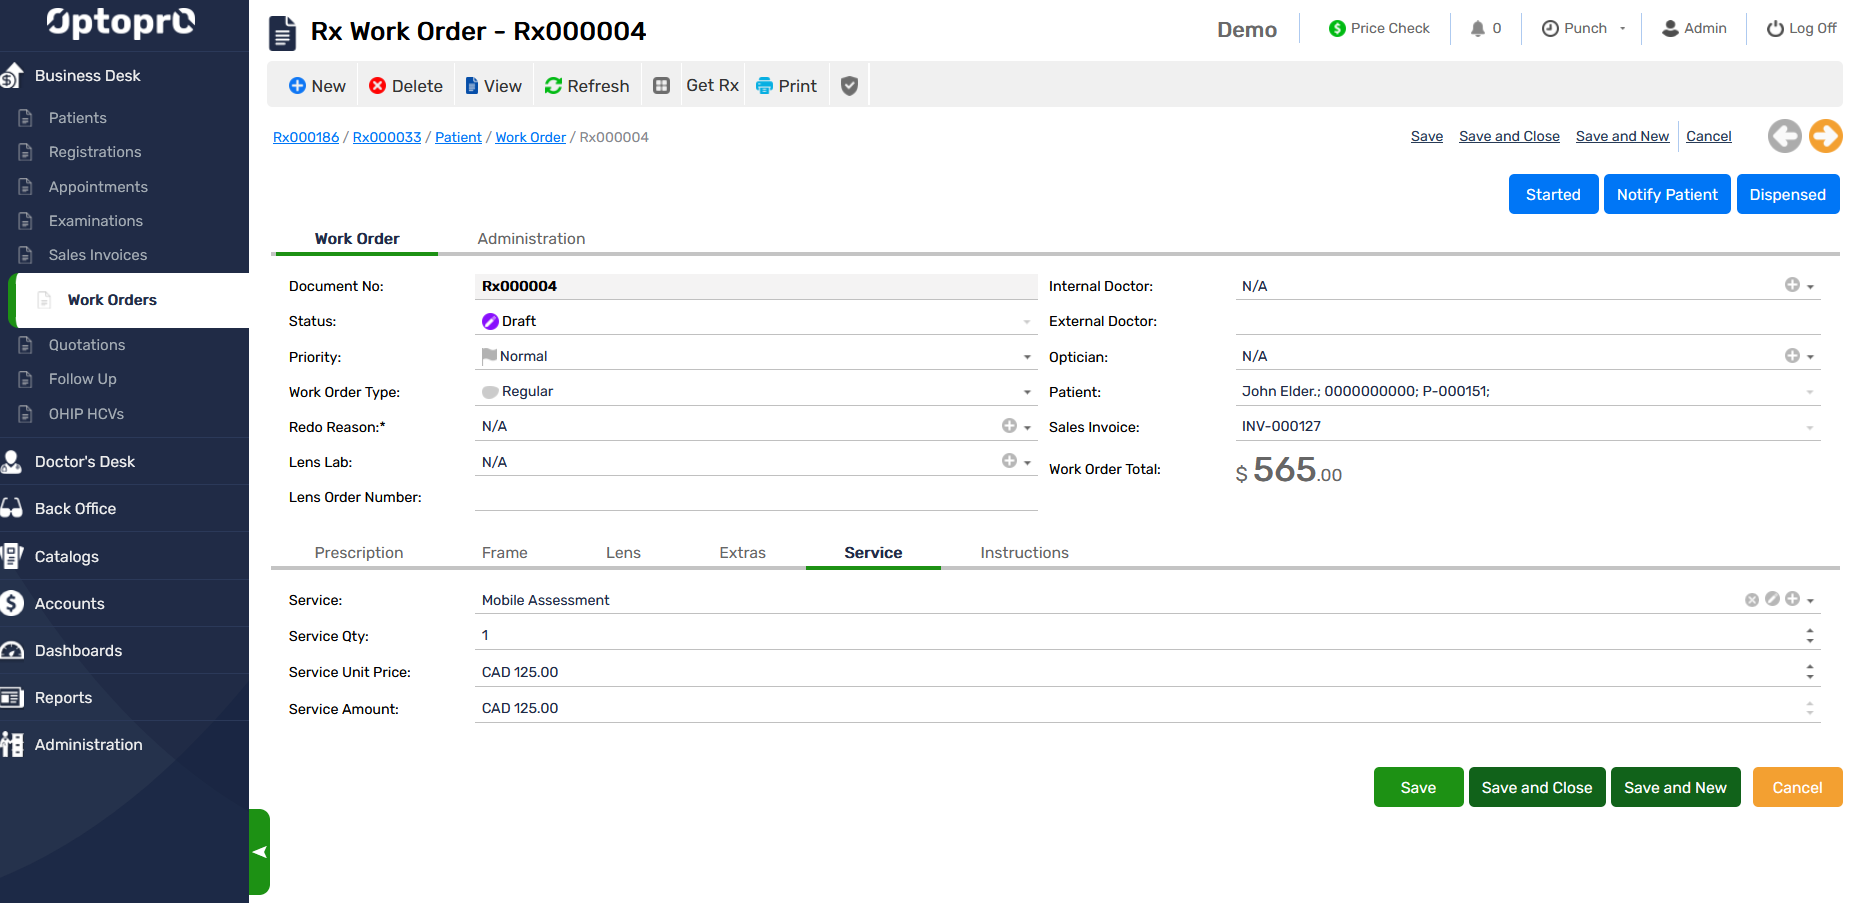
Add a Service in Work Order
You can add any additional services in the “Service” tab by entering the details
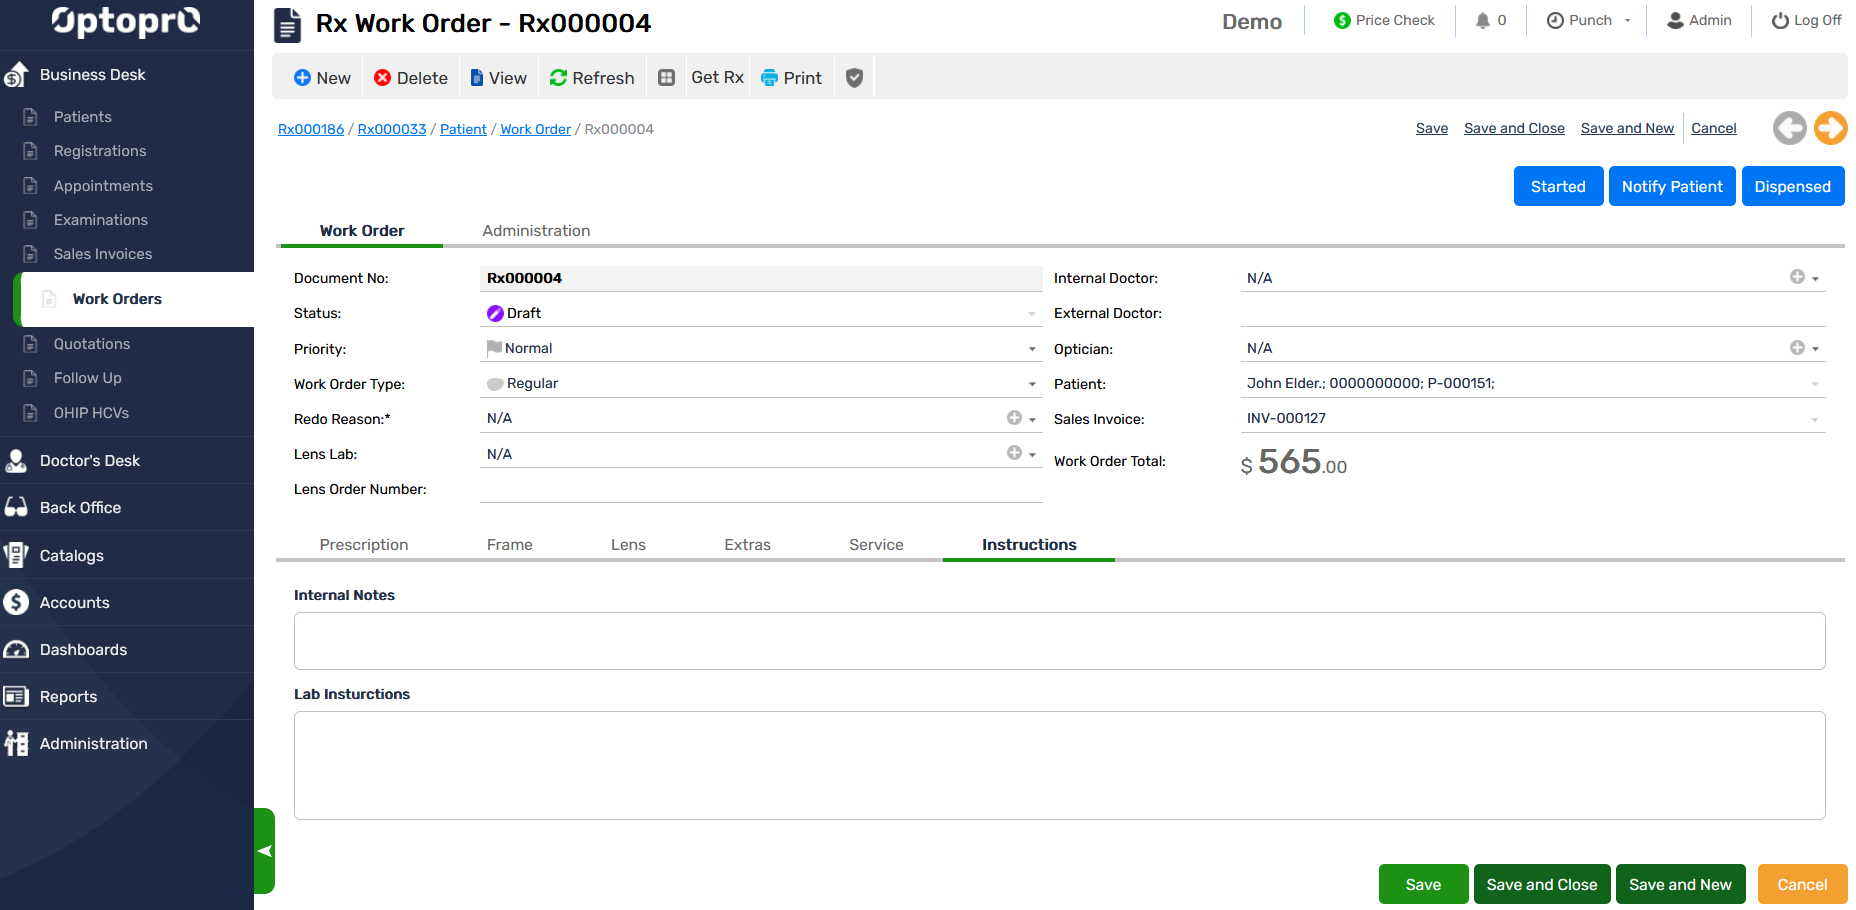
Add Instructions in Work Order
You can also add any additional instructions like internal notes or lab instructions in the “Instructions” tab. Click “OK” to save the Invoice for work-order.
Add Insurance details to Sales Invoice
You can add the primary and secondary insurance for the patient by selecting the insurance providers name from the list or add a new insurance provider by click on the “+”

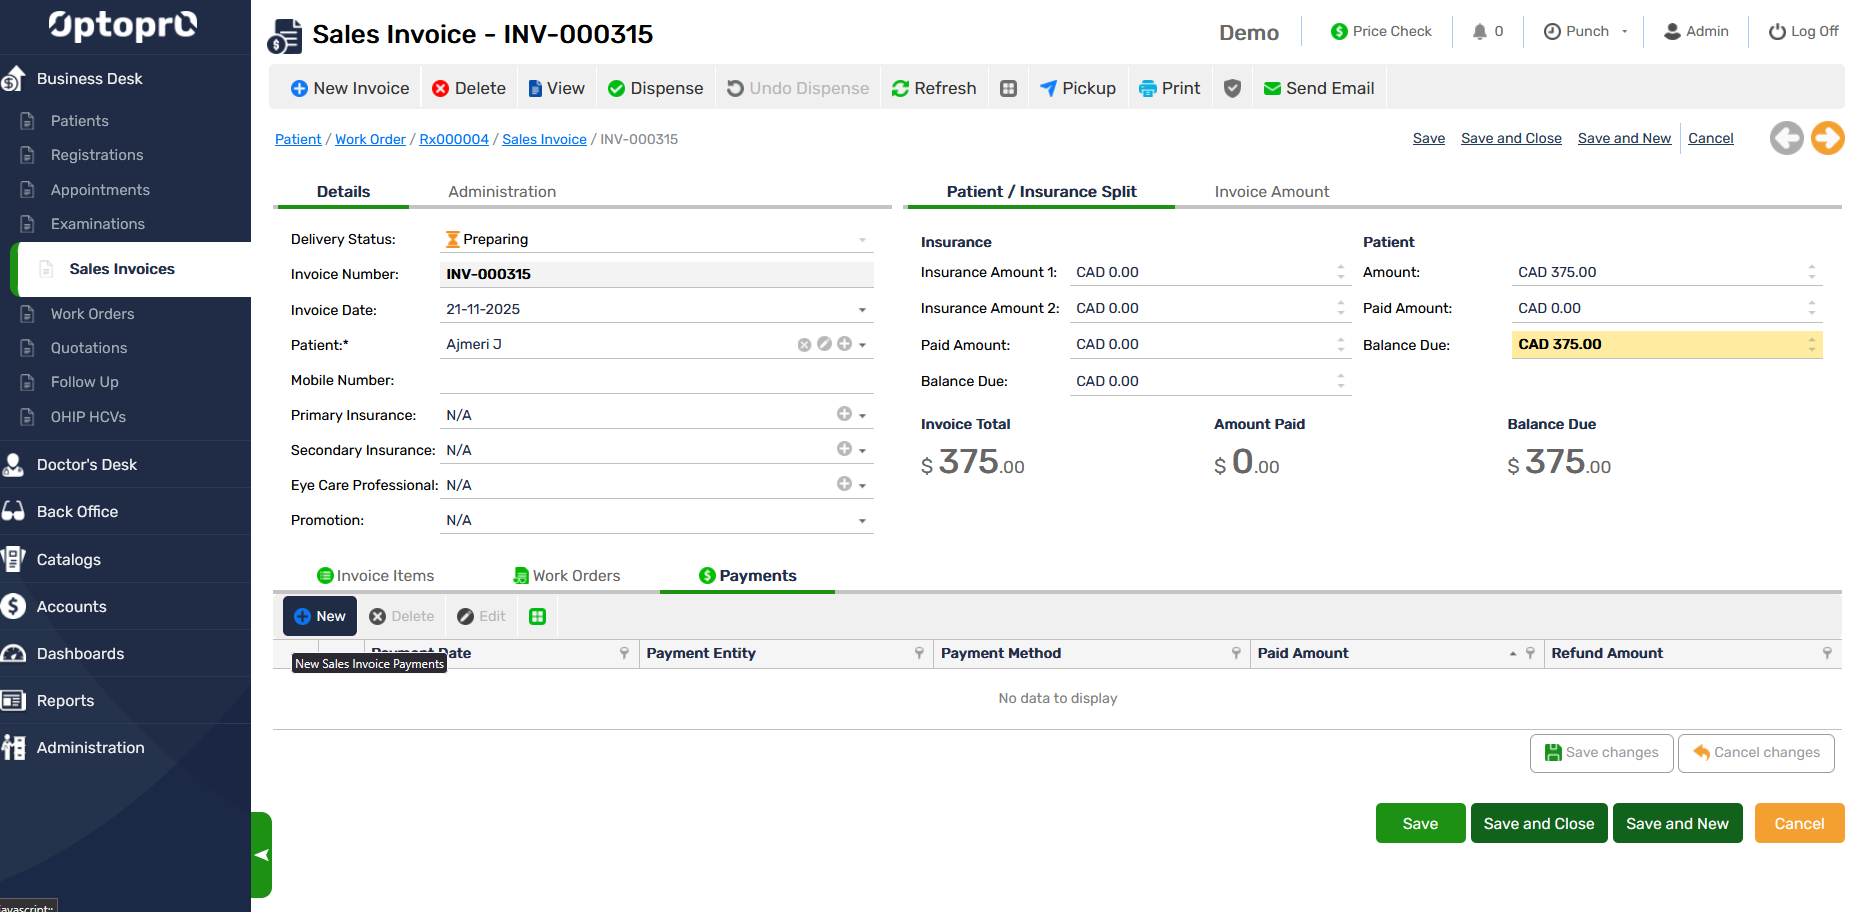
Add New Payment to Sales invoice
To add the details of payments to sales invoice
Step 1: Click on the “Payments” tab to enter the payments details
Step 2: Click on “New”, the following window appears to enter the information
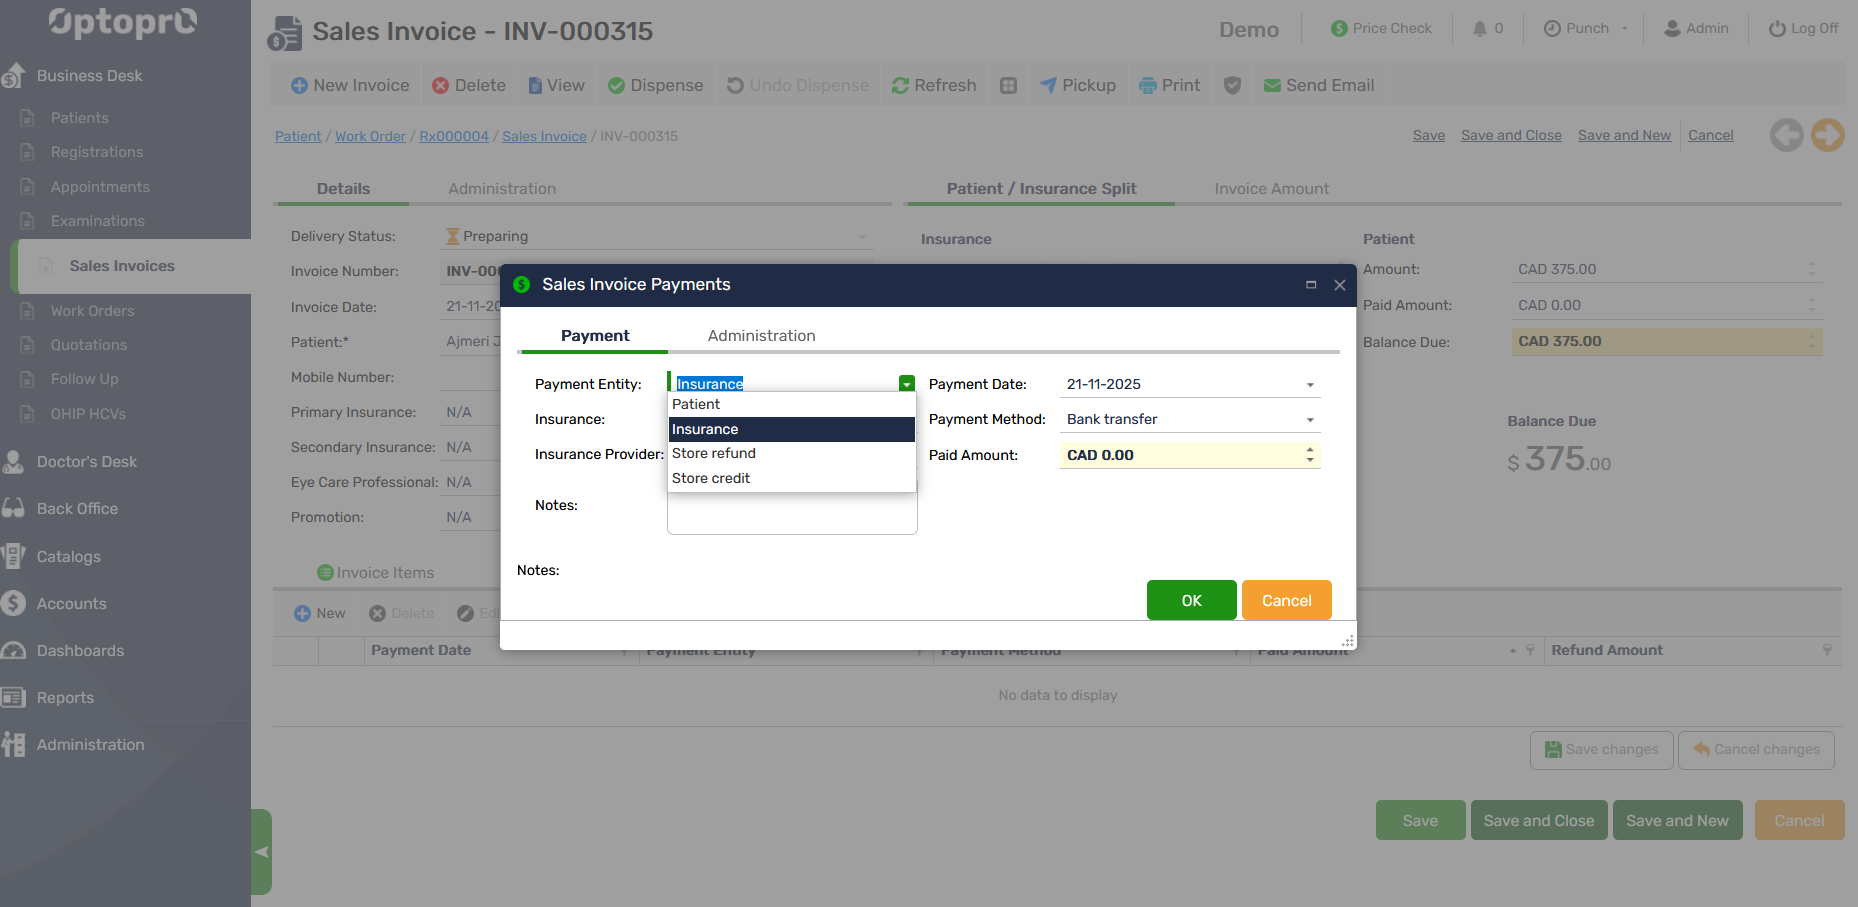
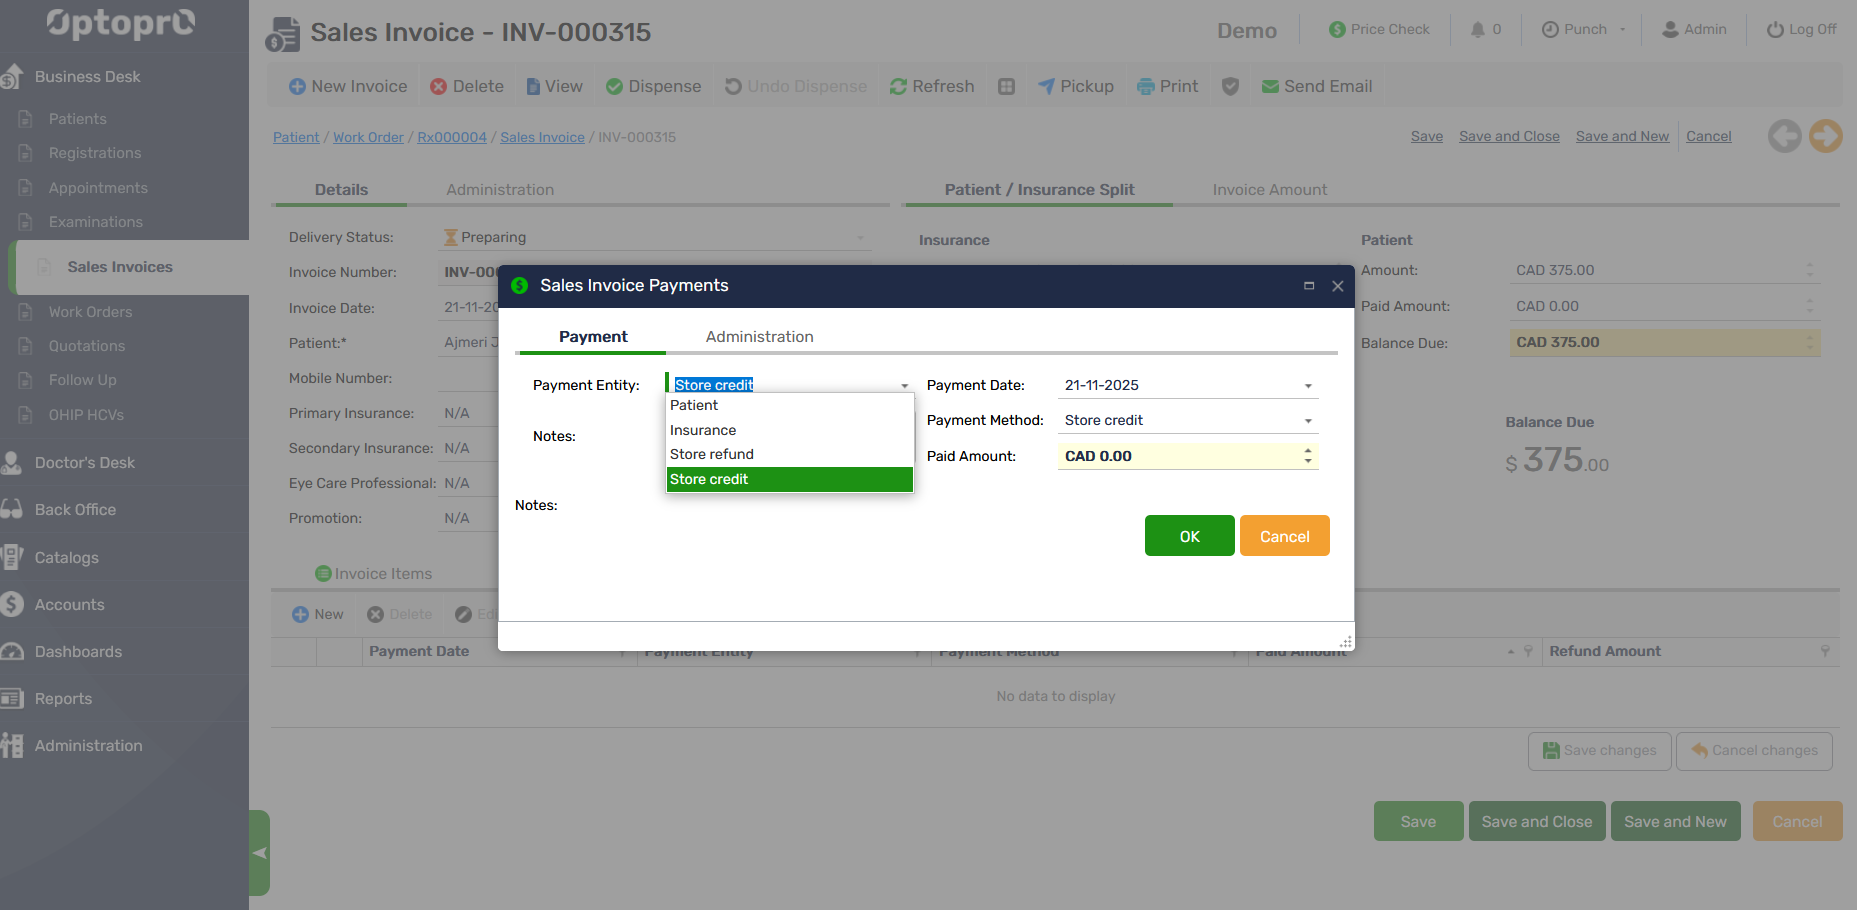
You can select the Insurance option from the drop-down list as shown in below image to add payments from the insurance company.

Select the mode of payment as shown below
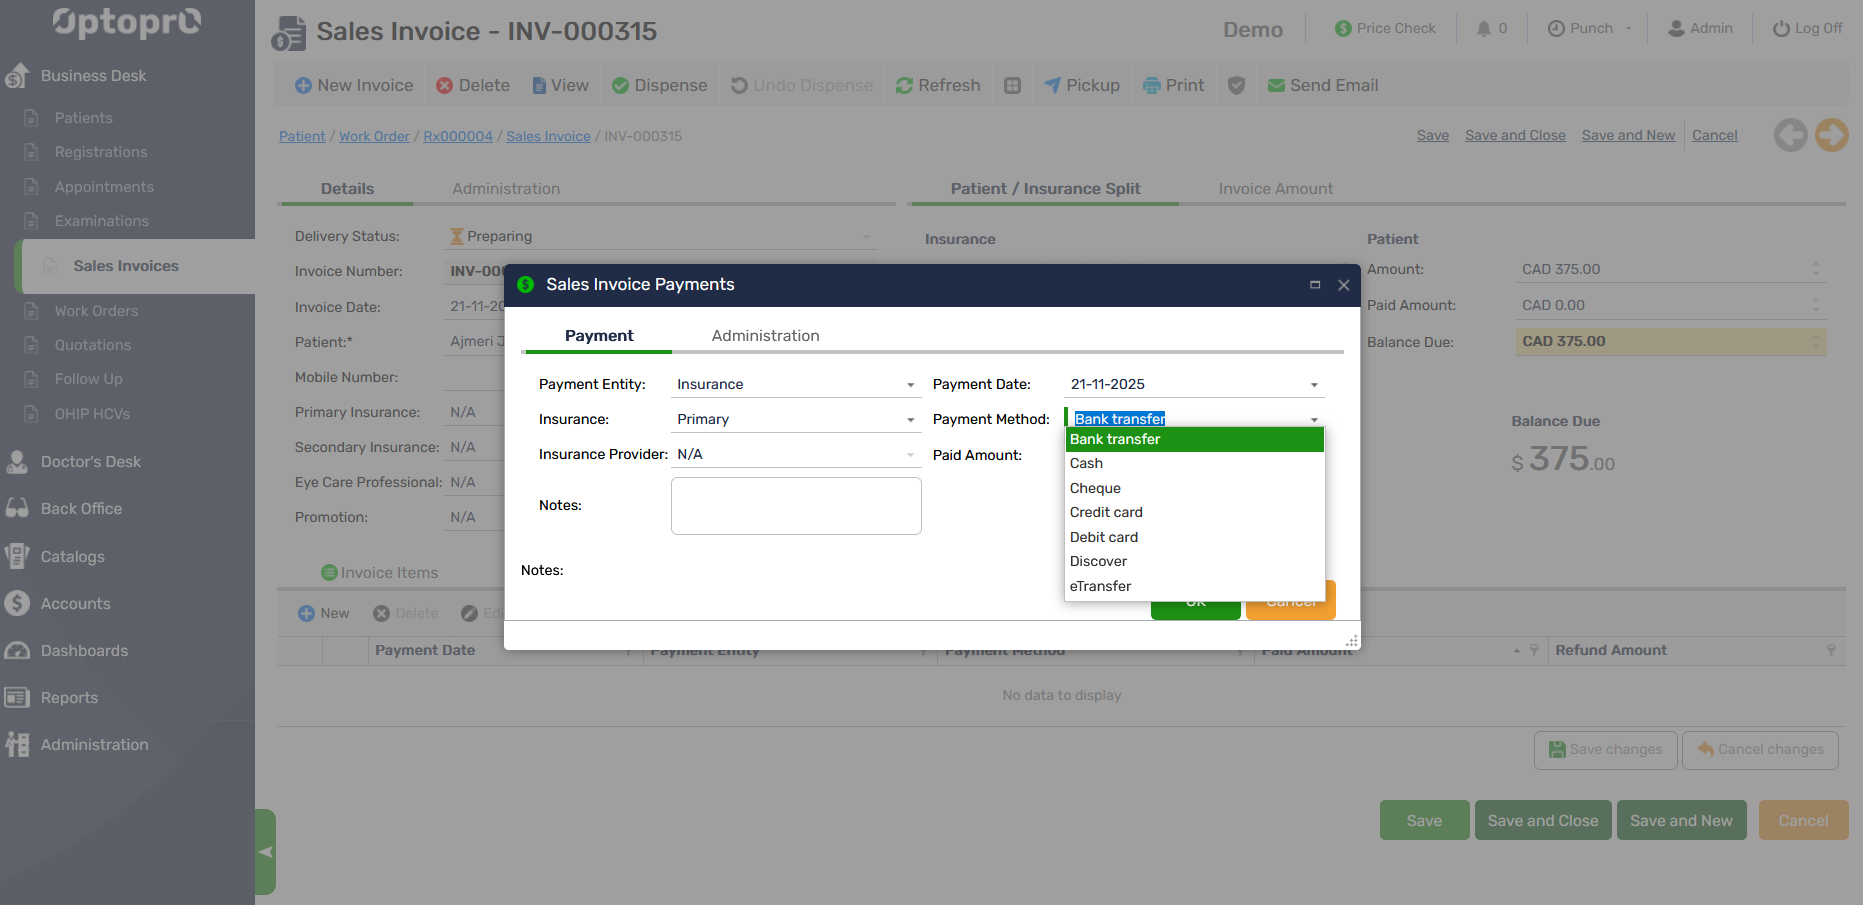
Click “OK” to save the payment details.
In case the Patient received any store credit from the store, this can also be used as a payment option as shown below
Once the payment is complete the “Balance due” shows zero if the payments are completed or displays any balance left.
