-
Updates
-
Patients
-
Appointments
-
Examinations
-
Sales
-
Inventory
-
Promotions
-
Catalogs
-
Dashboards
-
Integrations
-
System
-
Resources
Gmail SMTP Server Setup
Send email with the Gmail SMTP server
Watch the youtube video with step by step instructions by clicking on the link below:
https://www.youtube.com/watch?v=ZfEK3WP73eY
OR
Follow the steps below to send emails via Gmail SMTP server that can be configured from your own Gmail account used for your business.
Step 1: Goto https://www.google.com/account/ and login to your Gmail account for eg. xyz@gmail.com
Step 2: Goto https://myaccount.google.com/security
Click on Security
It is important to enable 2-Step verification for Gmail server setup. Click on 2-Step Verification.
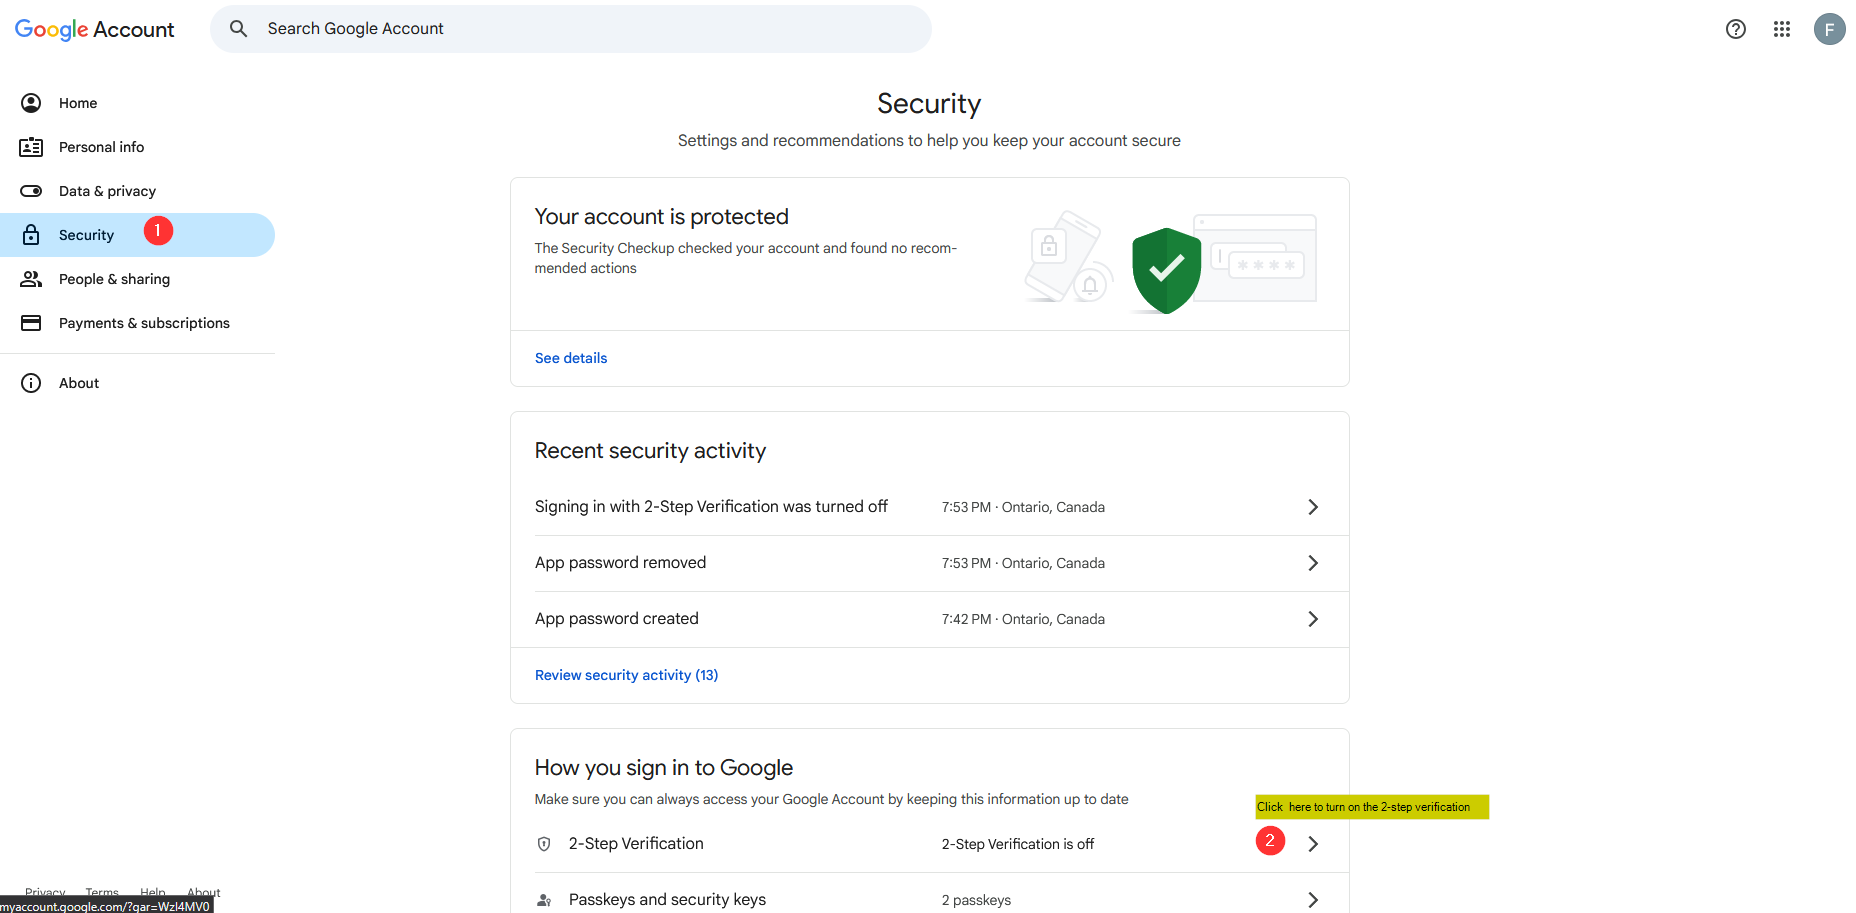
Step 3: Turn on 2-Step Verification by clicking on the blue button as shown

Step 4: Verify your phone number is correct and click “Done”
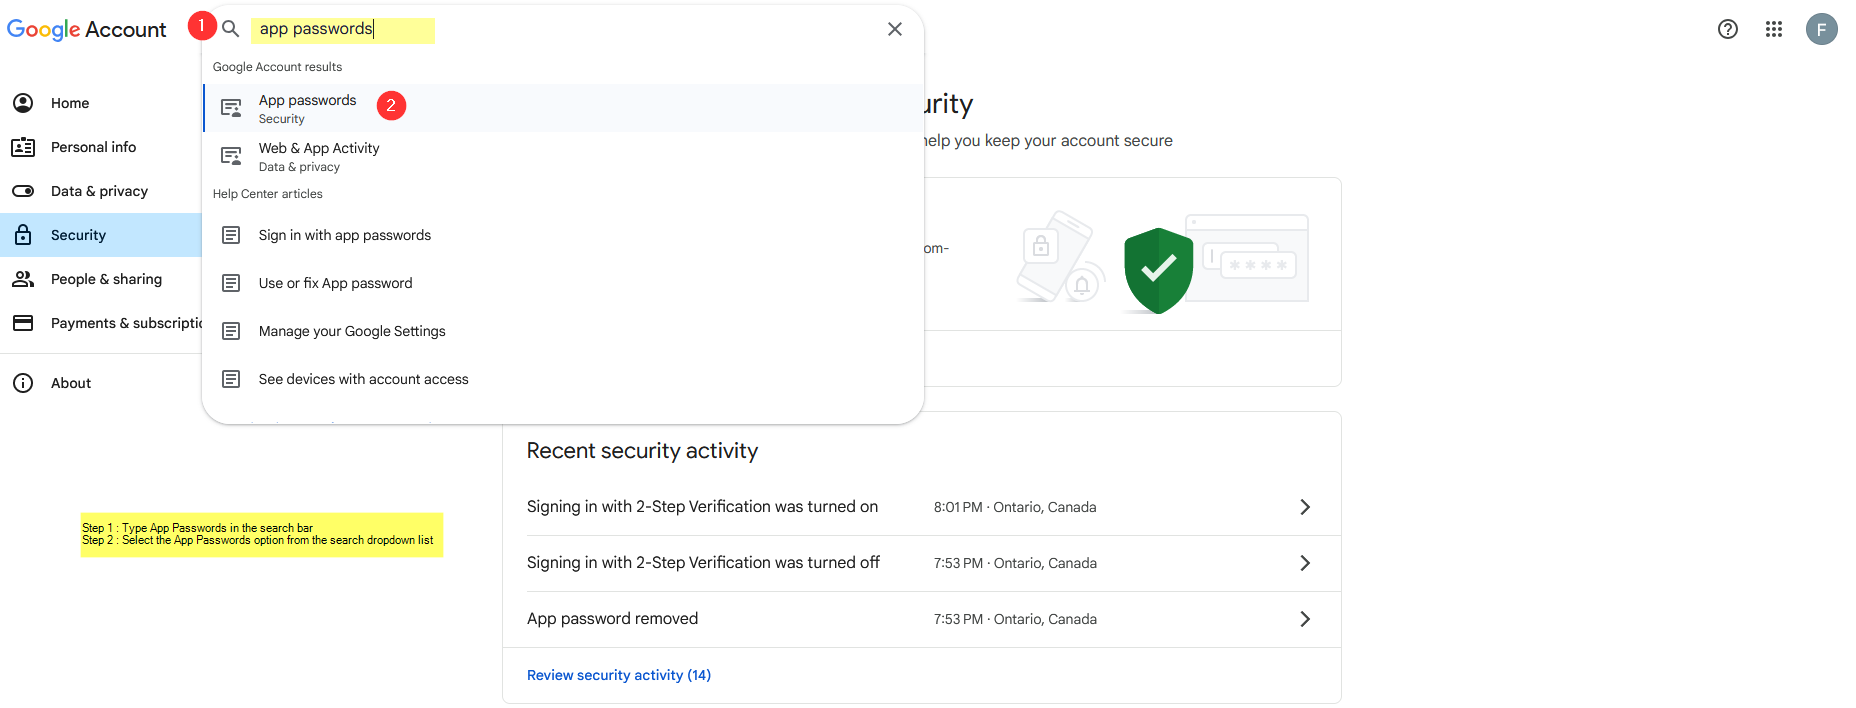
Step 5: Click on Back Arrow <- to go back to your account settings page
Step 6: In security section, type “App password” in search bar as shown below and select the App Passwords from the list
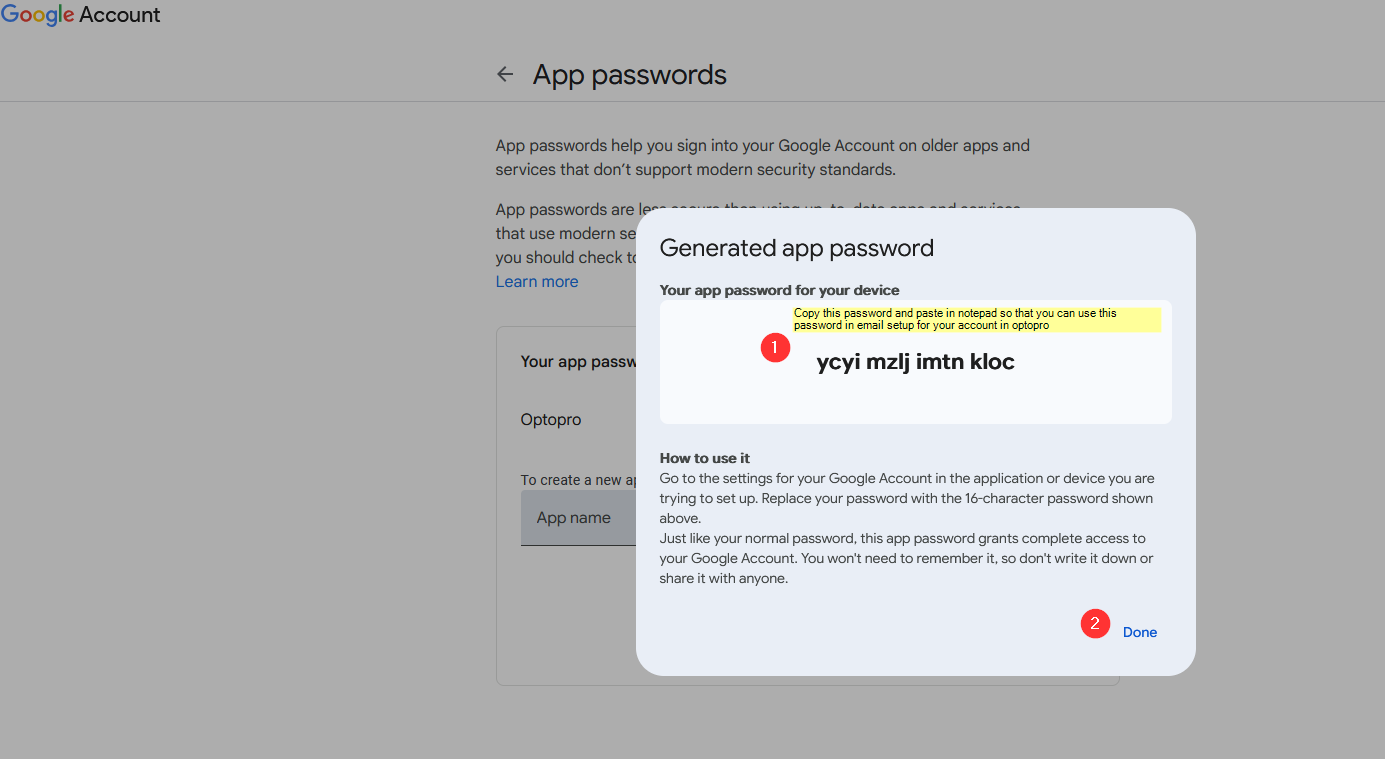
Step 7: Now type the name of the app or the name of your business and click “Create”
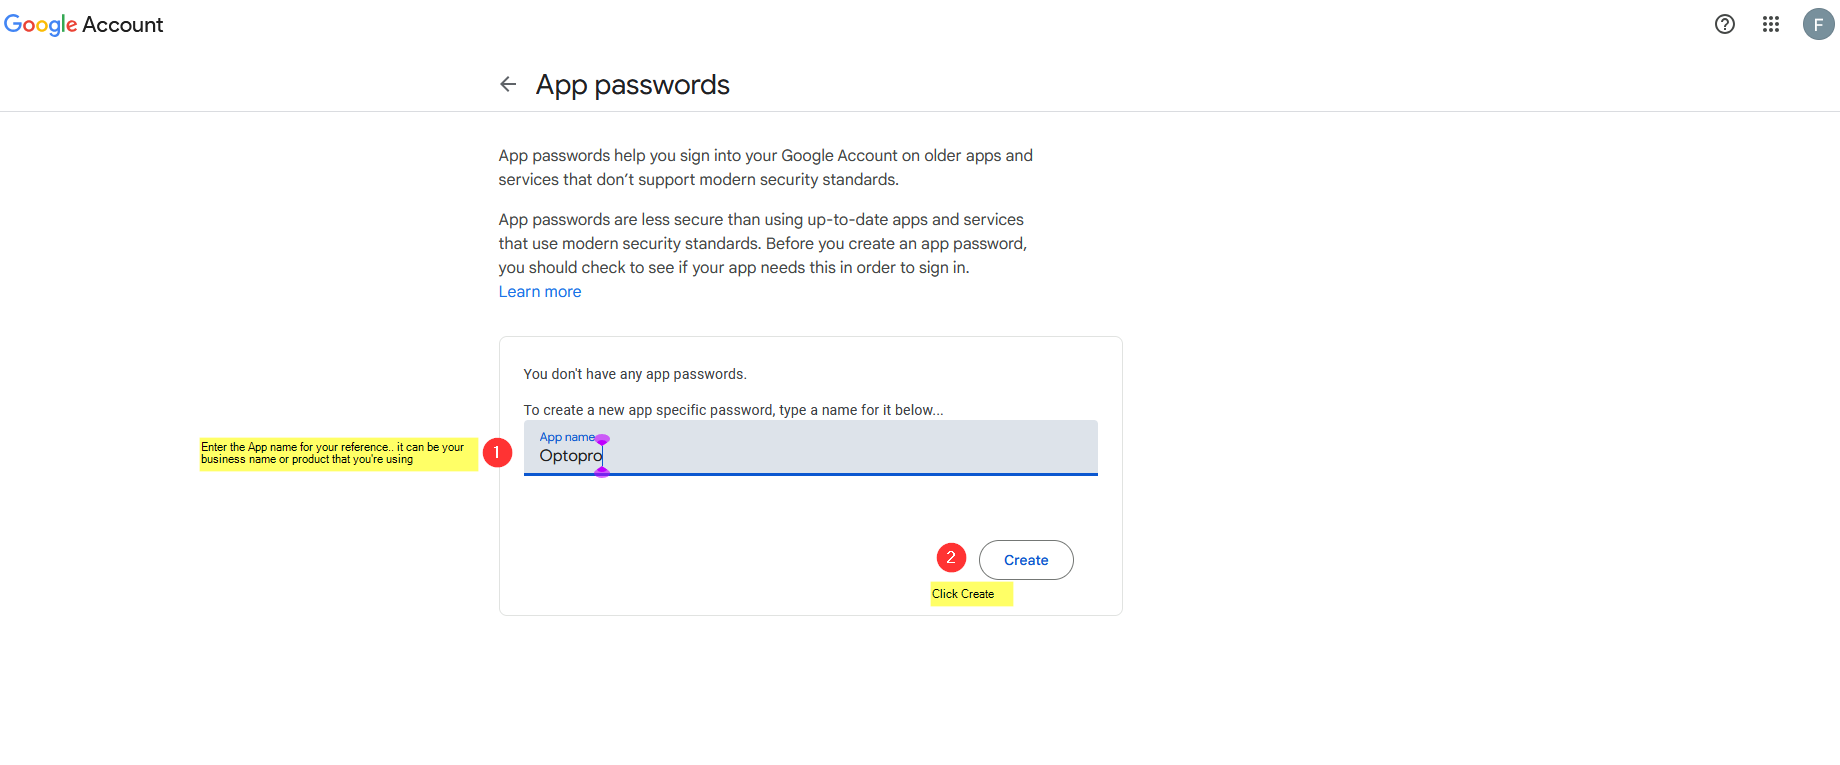
Step 8: A new password will be generated, copy this password and paste on a clipboard or a notepad, as we will need this to configure SMTP server email setup in Optopro for sending email notifications from your business email.
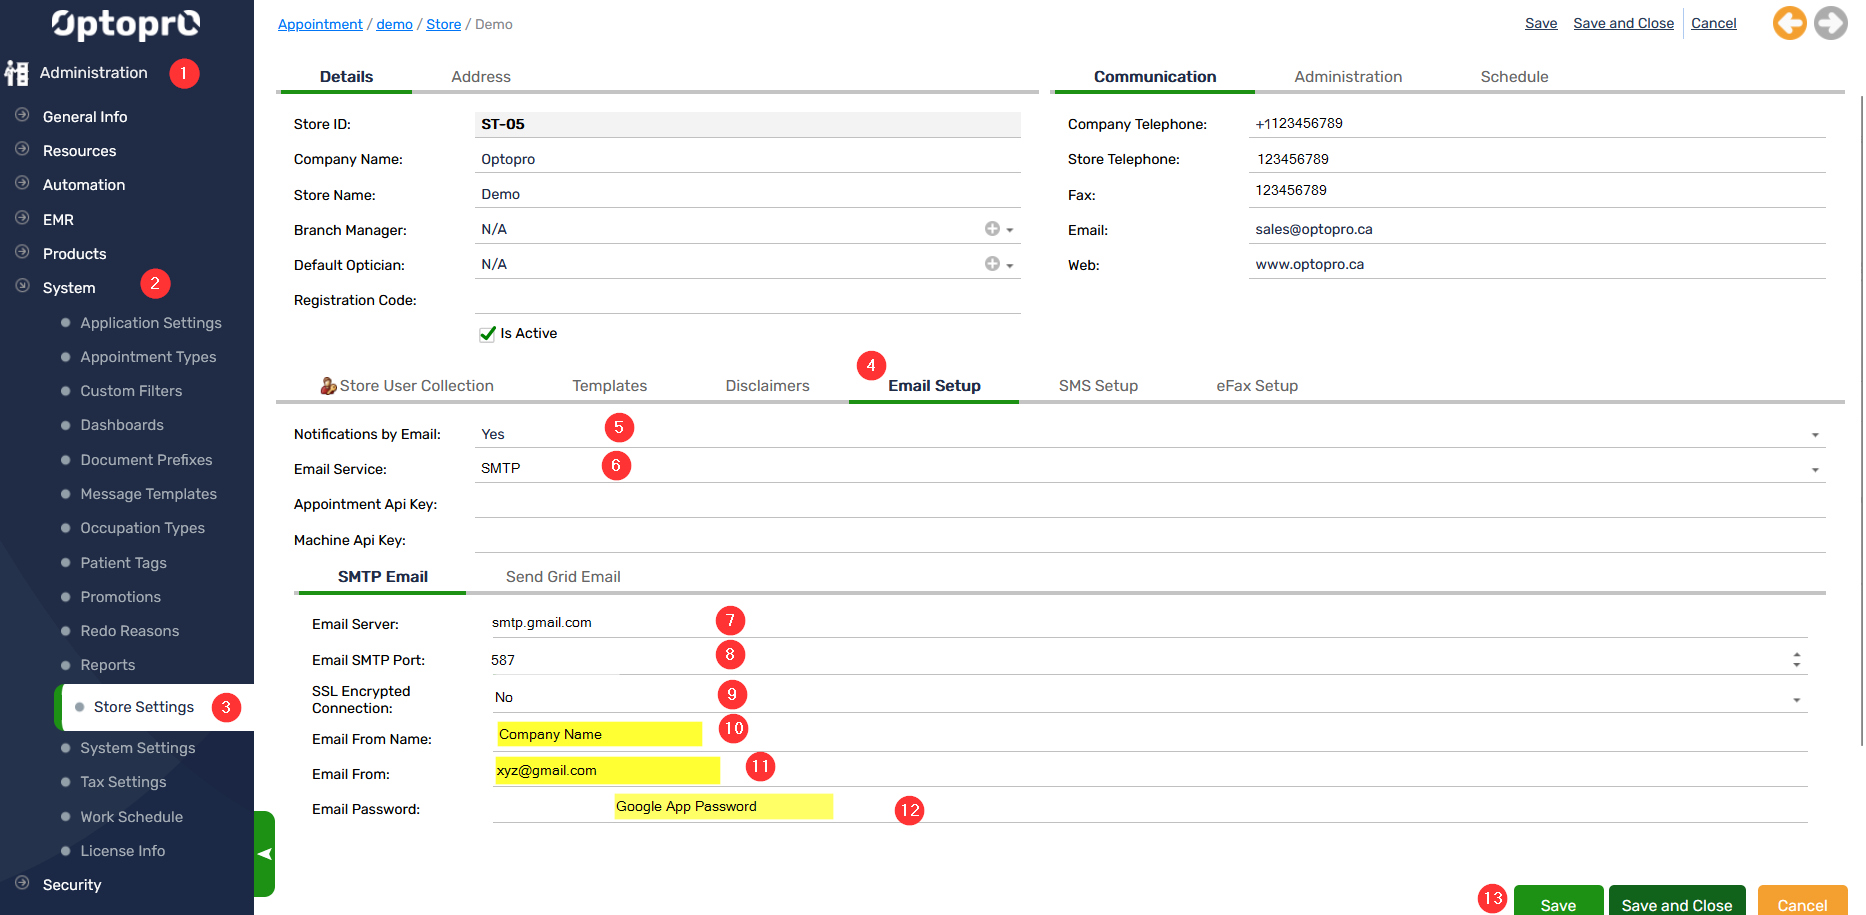
Step 9:
- Click “Administration” on the left panel of Optopro Application
- Next click “System”
- Now click on “Store Settings”
- Click on tab “Email Setup”
Enter the following details
5. Notifications by Email : Yes
6. Email Service : SMTP
In SMTP Email Tab enter the following
7. Email Server : smtp.gmail.com
8. Email SMTP Port: 587
9. SSL Encrypted: No
10. Email from Company : “Your name/Company-name” (i.e. name from whom you wish to send notifications to your patients)
11. Email From: “Your email address” ( i.e. from the email you’d like to notify your patients)
12. Email Password : “Google App Password” (i.e. the app password generated from your google account)
13. Save the settings and get going!
Check the image below: